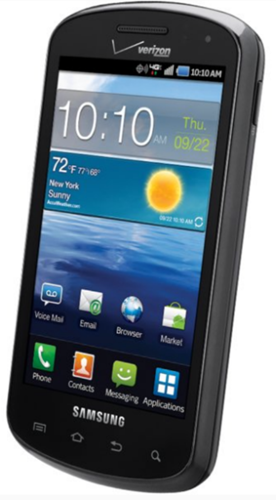
Developers from the Rootzwiki forums have already managed to get root-access on the recently released Samsung Stratosphere on Android 2.3.5 Gingerbread. Check out the step-by-step guide after the break!

The root guide comes from developer knightcrusader over on Rootzwiki forums. If you’re interested, you may start the rooting process after carefully reading the disclaimer.
How To Root Samsung Stratosphere on Android 2.3.5 Gingerbread
DISCLAIMER: Redmond Pie is not to be held responsible for any loss of data as a result of the malfunctioning of your Samsung Stratosphere in the following of this guide. Follow at your own risk.
The developer suggests going for Heimdall – an open source tool for flashing firmware on Galaxy S-based devices such as the Stratosphere – as opposed to ODIN because Heimdall works on Windows/OS X/Linux.
Before starting, be sure to set up the Android Debug Bridge (ADB) toolkit so you can debug your Stratosphere. ADB can be downloaded from here.
Step 1: Download the .zip file of Heimdall 1.3.1 [Official Website] and extract its contents using suitable software (I personally recommend 7-zip).
Windows users: be sure to install the C++ redistributables as well otherwise the tool won’t work.
Step 2: Boot your Samsung Stratosphere into Download Mode. You can do this by turning your phone off and then powering it on while holing Volume Down button.
Step 3: Your device will say Download Mode Do Not Turn Off Target. At this moment, you must connect your phone to your computer with USB cable.
Windows users only: After following above step, navigate to folder you extracted in Step 1 > Drivers > zagig.exe. You will need to setup drivers using this; click on Install Driver when it asks and then replug your phone and reboot your PC if you need to.
Step 4: Download the following files:
- Stratosphere Root.zip [Box.net Link]
- Stock Kernel.zip [Box.net Link]
Extract their contents to the same folder you extracted Heimdall to in Step 1.
Step 5: Launch a terminal window (or Command Prompt for Windows), navigate to folder in Step 1 and type the following:
heimdall detect
If you device is detected, type:
heimdall flash –kernel root-zImage
A custom kernel will be flashed to your device. It will now reboot with a yellow ! triangle symbol.
Step 6: Enable USB Debugging from Settings > Applications > Development.
Step 7: Ensure that your phone is detected and attached to your computer:
F:\Downloads\heimdall-suite-1.3.1-win32>adb devices
List of devices attached
3235A3CA0D8400EC device
You must now remount file system:
F:\Downloads\heimdall-suite-1.3.1-win32>adb remount
remount succeeded
Step 8: Push required files to the phone:
F:\Downloads\heimdall-suite-1.3.1-win32>adb push su /system/bin
F:\Downloads\heimdall-suite-1.3.1-win32>adb push busybox /system/bin
F:\Downloads\heimdall-suite-1.3.1-win32>adb push Superuser.apk /system/app
Step 9: Change permissions for su and busybox:
F:\Downloads\heimdall-suite-1.3.1-win32>adb shell chmod 4755 /system/bin/su
F:\Downloads\heimdall-suite-1.3.1-win32>adb shell chmod 4755 /system/bin/busybox
Step 10: That’s it! Your device will now be rooted!
If you followed the steps correctly, your Samsung Stratosphere will now be rooted on Android 2.3.5 Gingerbread. Make good use of root privileges by looking for powerful root-only apps like Titanium Backup, ROM Manager from Android Market.
If you’ve got any queries, check out the official thread on Rootzwiki.
You can follow us on Twitter or join our Facebook page to keep yourself updated on all the latest from Microsoft, Google, Apple and the web.

