In this day and age and with the world becoming an ever increasingly connected one, we are more often than not connected to the internet on our computers and that’s often via the magic that is WiFi.
If you’re a Mac owner, macOS does a pretty good job of remembering which WiFi hotspots you have connected to in the past, and even manages to take into account networks that your iOS devices have used thanks to iCloud syncing, so if your iPhone has connected to the coffee shop WiFi at some point, then your MacBook Pro will, too. It’s all miraculous and it even works most of the time!


But sometimes, even macOS needs a helping hand, and that’s where you come in. Deleting known WiFi hotspots can be a cathartic experience if you know you won’t need them again, and sometimes, you just need to change the priority of access points to ensure the right one with strongest signal is used at the right time for best performance. All of that is manageable through just a few clicks and drags of the mouse, so we’re going to tell you exactly how to do it now, because we’re nice like that.
We’ll start off with how to delete known WiFi hotspots and then show you how to set their priority order.
Deleting Known WiFi Hotspots
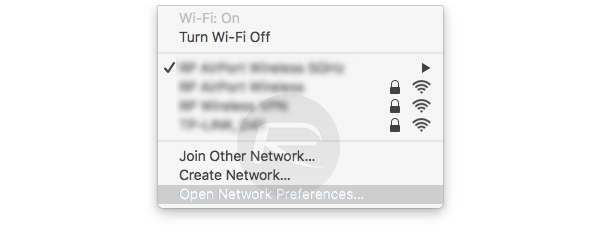
Step 1: Open System Preferences and click Network. Alternatively, click on the WiFi icon in the Menu Bar on the top right and click Open Network Preferences.


Step 2: With WiFi selected in the left-hand pane, click Advanced in the right-hand pane.
Step 3: You’ll now see a list of known WiFi hotspots. Click the one you want to remove and click the ‘-‘ button.
Step 4: Repeat until you’re all tidied up.
Changing Priority of WiFi Hotspots
Step 1: Open System Preferences and click Network. Alternatively, click on the WiFi icon in the Menu Bar on the top right and select Open Network Preferences.
Step 2: With WiFi selected in the left-hand pane, click Advanced in the right-hand pane.
Step 3: You’ll now see a list of known WiFi hotspots. Click and drag the hotspots into the order in which you would like macOS to connect to them should more than one be available at any given time.
And that’s all you need to know in order to tidy your known WiFi hotspots up. Cleaning and setting priority order of WiFi hotspots has never been so fun!
You might also like to check out:
- How To Speed Up Apple Mail App On Mac Running macOS
- Fix No WiFi Available After Windows 10 Upgrade Issue, Here’s How
- Fix Snapchat Account Locked Issue After Using Phantom And Snapchat++ Tweaks, Here’s How
You can follow us on Twitter, add us to your circle on Google+ or like our Facebook page to keep yourself updated on all the latest from Microsoft, Google, Apple and the web.
