On Wednesday, Microsoft officially released the Windows 8 Consumer Preview (which is essentially a fancy term for ‘public beta’). If you’re eager to dabble around with the build in a virtual machine – perhaps due to the lack of a non-production machine, a spare partition, the fear of using it in a production environment, or, well, if you just want to install it in a virtual machine – then you’re in luck.
Here’s a quick tutorial that will show you how to install Windows 8 in a VirtualBox virtual machine, so you can enjoy the Consumer Preview from the comfort of a safe and sound OS. So, what do you need? A copy of VirtualBox (free), and a copy of the Windows 8 Consumer Preview, which you can grab from here. Let’s get started.

Step 1: Launch VirtualBox and click on the "New" button to create a new virtual machine. In the wizard that pops up, select the Microsoft Windows Operating System and the Windows 8 version (remember to select the 64-bit version if your ISO is an x64 copy).

Step 2: Select the amount of memory that you wish to allocate to the virtual machine. VirtualBox recommends the staggeringly specific amount of 1536, so I just went with that. Raise or lower the memory amount as you please, but bear in mind that decreasing it too far beyond the minimum recommended amount will lead to diminished performance.

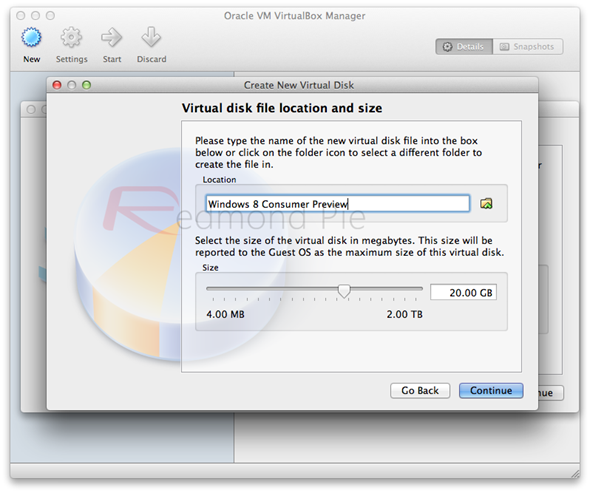
Step 3: Now, you’re going to have to create a new virtual hard disk. VirtualBox recommends that its size be 20GB; this is the minimum amount that Windows 8 needs for its x64 version (x86 is 16GB). If you do wish adjust this amount, the only way you can go is up.

Step 4: Select the virtual disk file type that you wish to use. I went with a VirtualBox disk image as I won’t be using this virtual machine with other VM software, but you do have the option to select a more generic file type if needed.

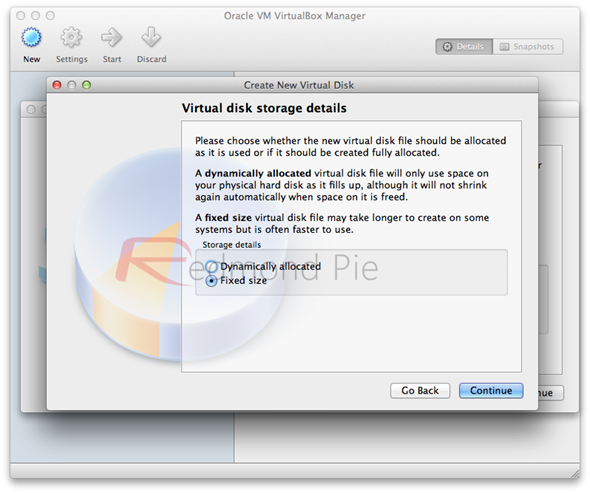
Step 5: You will be able to choose between a fixed virtual hard drive size and a dynamically allocated size. Basically, the latter will allow your virtual machine hard disk size to increase in size as it fills up. If you choose to create a fixed virtual hard drive size, set your HDD size here.


Step 6: We’re getting there. Verify that the settings are the ones that you desire, and create the virtual machine.

Step 7: Now, start the virtual machine that you just created; a wizard will appear.

Step 8: Browse to and select the Windows 8 Consumer Preview ISO that you downloaded.

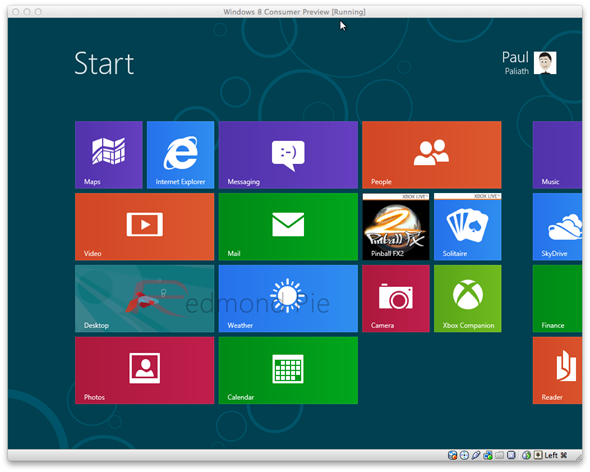
Step 9: Install Windows 8. Assuming that the previous steps were performed correctly, you should now be viewing Windows Setup.

Step 10: Wrap up the Windows 8 installation process, and voilà.


Now, while all of the screenshots above were taken on OS X, this configuration process is the same on Windows.
Enjoy Windows 8!
You may also like to check out:
- Install Windows 8 Consumer Preview Using A Bootable USB Flash Drive
- How To Install And Run Android 4.0 On Mac, Windows PC Or Linux [Tutorial]
- Install Windows 8 Developer Preview In VirtualBox Virtual Machine On Mac & Windows 7 [How-To Tutorial]
You can follow us on Twitter, add us to your circle on Google+ or like our Facebook page to keep yourself updated on all the latest from Microsoft, Google, Apple and the web.

