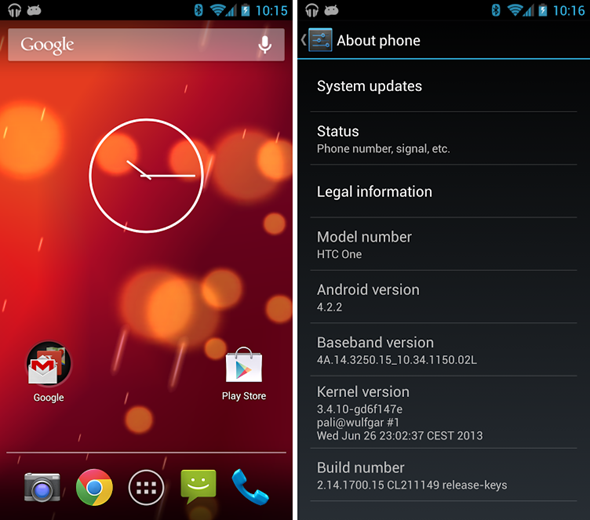
HTC’s latest flagship Android smartphone, the HTC One, has been making headlines around the blogosphere for quite some time, and rightly so, thanks to the device’s many enticing features. It’s the first phone to come with HTC’s proprietary Sense 5 UI skin, and boasts hardware enhancements such as the UltraPixel camera module and what not. Combine that with the device’s extraordinary build quality, and you have a winner through and through.
The thing with devices of this magnitude is the overwhelming amount of developer attention that they muster. For HTC One, the win comes in the form of a custom ROM from the Google Edition HTC One that’s going to make any AT&T/T-Mobile/Developer edition device as close to one as you’d get from the Play Store, making it vanilla but with a twist – everything (almost) works as it’s supposed to. It delivers complete stock Android experience, and unlike other custom ROMs out there (CyanogenMod, AOKP, PA etc.), does not come with a host of “broken features” or bugs. You get fully working LTE, very decent camera quality, SD card functionality, and even a Beats Audio driver that actually works. The only missing element is the lack of accurate mobile data usage monitoring, but you can get that through a variety of free apps available over at the Google Play Store.

In terms of requirements, the ROM requires a rooted device with a custom recovery installed (both CWM and TWRP are supported). TWRP is generally more preferable thanks to certain features that CWM lacks. The ROM is also only compatible with GSM versions of HTC One. You can follow our guide on how to unlock HTC One Bootloader right here, how to root HTC One and how to flash ClockworkMod Recovery on HTC One. Make sure you have HTC USB driver for One configured on your machine
Before we delve into the actual flashing procedure, be warned that any custom ROM would not only void your warranty, but you solely are also responsible for any damage that may happen to your device. While tested and proven to be safe, Redmond Pie cannot be held liable for any damage to your HTC One as a result of following these instructions. Check out how to completely backup your Android device on PC without root access.
Step 1: Download the ROM from here and save it to the SD card in your HTC One.
Step 2: Boot your HTC One into Recovery by pressing the Power and Volume down buttons, and do a factory reset/wipe data.
Step 3: Go to Install ZIP From SD Card, followed by Choose ZIP From SD Card, and flash the ROM package.
Step 4: Once the flashing is complete, reboot the device.
That’s it – you have successfully turned your HTC One to a Google Edition device.

You can follow us on Twitter, add us to your circle on Google+ or like our Facebook page to keep yourself updated on all the latest from Microsoft, Google, Apple and the Web.

