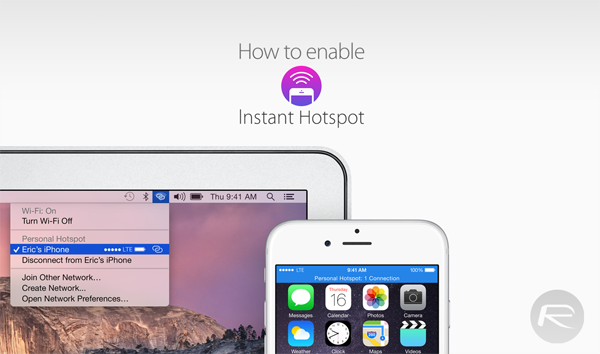
Here’s a complete step by step guide on how to enable and use the Instant Hotspot feature between a Mac running OS X Yosemite and iOS 8.1 running iPhone or iPad.
It’s long been possible to enable a Personal Hotspot connection on an iPhone or iPad, depending on the limitations of the network, and then connect a Mac to that hotspot to take advantage of the Internet connection. However, Instant Hotspot, a Continuity feature in Yosemite, makes the whole process a lot more convenient by abstracting away a layer of security and automating the process through the Wi-Fi settings. A shared iCloud account signed in on the mobile device and the Mac handles all relevant security. Enable Wi-Fi and Bluetooth and you’re good to go.
Prerequisites
- If you’re looking to take advantage of the latest Instant Hotspot feature than you’ll need an iPhone or iPad with the latest iOS 8.1 firmware installed. Additionally, you’ll also need a Mac running OS X Yosemite.
- You will also need to make sure that the data plan on your mobile device is handled by a network that allows Internet hotspot features. At the time of writing, AT&T, Verizon, and T-Mobile in the United States allow this functionality with specific plans. Of course, mileage may vary depending on your individual location and plan.
- Because security is handled by a common iCloud account, make sure you are signed into the same account on all devices that will be used.
Enable Instant Hotspot
Step 1: Make sure that Wi-Fi is enabled on your iPhone or iPad. This can be activated by navigating to Settings > Wi-Fi. Alternatively, you can also slide Control Center up from the bottom of the display and use the Wi-Fi quick toggle.
Additionally, ensure that Wi-Fi is also turned on and ready to use on the Yosemite running Mac being used. Click on the Wi-Fi symbol in the Menu bar and then click on Turn Wi-Fi On.
Step 2: Turn on Bluetooth on the iOS device being used by navigating to Settings > Bluetooth.
If it isn’t already, also enable Bluetooth on the Mac by heading to System Preferences > Bluetooth > Turn Bluetooth On.
Step 3: On the Mac with Yosemite installed, click the Wi-Fi symbol that appears in the Menu Bar. This provides access to available wireless networks and common Internet settings. If Bluetooth and Wi-Fi are switched on the iOS device, then a new Personal Hotspot will appear outlining the name of the device that it has recognized.
Step 4: The iPhone or iPad that is broadcasting the hotspot will now indicate a successful connection with a “Personal Hotspot: 1 Connection” blue bar across the top of the device.
Step 5: You should now be able to surf the Internet on the Yosemite running Mac by utilizing the broadcasted Internet connection from the iOS device.
You may also like to check out:
- How To Setup And Use Handoff In iOS 8 And OS X Yosemite [Guide]
- How To Use SMS Forwarding In iOS 8.1 On iPhone, iPad And Yosemite On Mac
You can follow us on Twitter, add us to your circle on Google+ or like our Facebook page to keep yourself updated on all the latest from Microsoft, Google, Apple and the web.

