If you are on a modded Nexus One, with either a root on the stock Android 2.1, or with the HTC Desire ROM and are too lazy to return to stock to receive the OTA update, this method is for you. As a pre-requisite, you will need to have an unlocked bootloader, and root access on your Nexus One. You will also need to have the patched recovery-RA-nexus-v1.5.3.img recovery on your N1.
If you meet all the pre-requisite requirements, then this guide is for you. Follow the instructions posted below to install Android 2.2 Froyo on your modded Nexus One.
NOTE: If you are on a stock Android 2.1 waiting for OTA update to receive, follow the instructions posted here to manually install the update now!
Step 1: Download the rooted Android 2.2 Froyo (FRF50) from the source link here and copy it to over to the root of the SD card on the phone.
Step 2: Now power off the phone and enter the recovery image by powering on while pressing the ‘Home’ trackball.
select “BOOTLOADER” –> “RECOVERY”
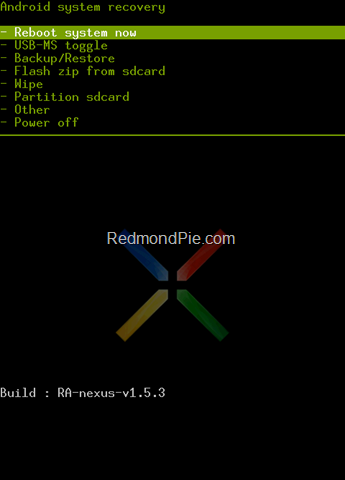
Step 3: Now you will be rebooted into custom RA recovery mode. Select ‘Backup/Restore’ from the menu to do a Nandroid backup.
Step 4: Now select “Flash zip from sdcard” to flash your Nexus One with this latest (already) rooted Android 2.2 Froyo FRF50 ROM.
Step 5: Do a complete wipe by selecting the “Wipe” option as seen in the screenshot above.
Step 6: Reboot your phone! Voila, you now have the rooted Android 2.2 ROM on your Nexus One!
You may also like to check out:
- HTC EVO 4G vs HTC HD2 vs Nexus One [Video]
- iPhone OS 4 vs Android 2.2 vs Windows Phone 7
- FarmVille on Nexus One – Flash 10.1 Demo on Android
- Nexus One to One-Up iPhone with Flash Player 10.1
You can follow me on twitter or join our facebook fanpage to keep yourself updated on all the latest from Microsoft, Google and Apple.


