Upgraded to iOS 9.3? Having issues and want to downgrade iOS 9.3 back to iOS 9.2.1? Here’s our step-by-step tutorial on how you can go about doing that on your iPhone or iPad.
If the iOS 9.3 update brought with it some unexpected problems, such as battery issues or slow performance, you would be glad to know that it’s still possible to downgrade from iOS 9.3 to iOS 9.2.1 while Apple is still signing the firmware.

Before we move onto getting our hands dirty, there are a few things that you should be aware of before proceeding to downgrade your device from iOS 9.3 to iOS 9.2.1. Here are they:
- Before embarking on any downgrade process, it’s always prudent to perform a full back up of the existing device on the current firmware. Make sure that you make local backups independent of the iTunes and iCloud backup as Apple doesn’t allow iTunes/iCloud backups made on newer firmware to be restored on older firmware.
- You’ll only be able to downgrade to iOS 9.2.1 as this is the only older firmware that is being currently digitally signed by Apple, but be warned that this window could close anytime now.
- If you’re looking to downgrade to get a jailbreak, Apple is no longer signing the last jailbreakable iOS 9.1 firmware, so that’s no longer possible.
- iOS 9.2.1 does not have a jailbreak as yet. Neither do iOS 9.3.
- Make sure that you’re using the latest version of iTunes to perform the restore.
How to downgrade iOS 9.3 to iOS 9.2.1:
Step 1: In the first instance, you’re going to need the iOS 9.2.1 IPSW file that’s relevant to your particular device. You can download that device specific file from here: Download iOS 9.2.1 Final Links for iPhone, iPad, iPod touch.
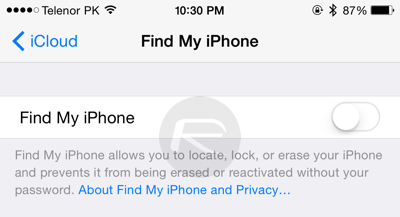
Step 2: Before you dive into the restore, there’s a little additional work needed to be undertaken on the device itself. Launch the Settings app on the iPhone or iPad and navigate to iCloud > Find My iPhone. Make sure to disable the Find My iPhone feature.

Step 3: Connect the iPhone or iPad to your Mac or PC using the relevant sync/charge cable to that particular piece of hardware.
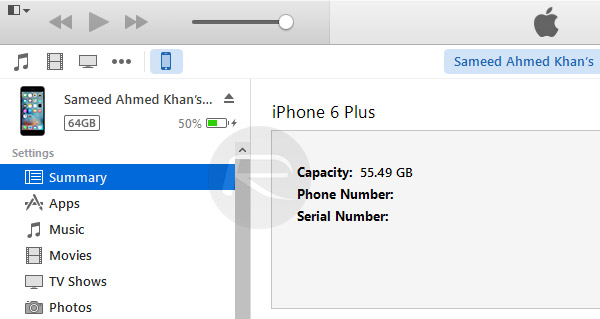
Step 4: Launch the latest version of iTunes on your Mac or PC. Make sure that your connected device is selected, then select the Summary tab to display all information about the connected hardware.

Step 5: Now that you’ve done a bit of housekeeping on the phone or tablet, it’s time to actually go through the restore process. If you’re using a Windows machine, hold down the ‘Shift’ key and click the Restore iPhone… button in iTunes. Mac users will need to hold down the ‘Option/Alt’ key at the same time as clicking the Restore iPhone… button.

Step 6: Make sure you select the relevant iOS 9.2.1 IPSW file that was downloaded as part of Step 1 when asked to locate an IPSW file. iTunes will walk you through a number of prompts that form part of the restore process. Make sure you follow this through accurately and accept anything that’s relevant.
iTunes will then go through the necessary process of restoring the device to iOS 9.2.1. When complete, the connected iPhone or iPad will reboot with a clean version of Apple’s older firmware installed.
As mentioned earlier, there is no jailbreak solution currently available for iOS 9.3, or iOS 9.2.1 for that matter, so those who have considered a downgrade for jailbreak reasons only would really be better of remaining as is. With that said, if the introduction of iOS 9.3 has brought some poor performance or battery issues, then moving to iOS 9.2.1 could potentially solve those.
You may also like to check out:
- Download iOS 9.3 Final Version For iPhone And iPad [Direct Links]
- iOS 9.3 / 9.2.1 / 9.2 / 9.1 Jailbreak Status Update
You can follow us on Twitter, add us to your circle on Google+ or like our Facebook page to keep yourself updated on all the latest from Microsoft, Google, Apple and the Web.

