Millions of iPhone, iPad and iPod touch users have been readily updating their firmware to the all-new iOS 7 since it first arrived on September 18th, but much like iOS 6 on the iPhone 3GS, the iPhone 4 struggles to offer the smooth, streamlined experience demanded by iOS 7. For the most part, it’s not particularly problematic, but if you’re rocking 2010’s flagship and would like to revert back to iOS 6, there may be a reprieve around the corner.
As you’ll probably know, you’ll need to have saved your SHSH blobs at some point in the past to make this work. Without it, you’ve no hope and are stuck on iOS 7.
![]()
If you’ve stored your iOS 6.1.3/6.1.2 blobs previously for safe-keeping, then check the guide below for a step-by-step to downgrading success. Please note, this guide is for Windows users, and is applicable only on iPhone 4.
Step 1: First up, you’ll need to be running iTunes 11.0.5 or below, so if you’re on a newer version like iTunes 11.1.x, you will need to essentially uninstall it first. This is because starting from iTunes 11.1, Apple has killed the ability to restore to custom firmware files from iTunes. When uninstalling, make sure you remove all traces, including services like Apple Mobile Device, Apple Software Update and Bonjour.
Step 2: After a restart to wash away those traces, download iTunes 11.0.5 from OldApps, or any similar such site [direct link]. Install it, and if you encounter an error relating to "iTunes Music Library.xml", head over to your iTunes Music folder and delete said file.
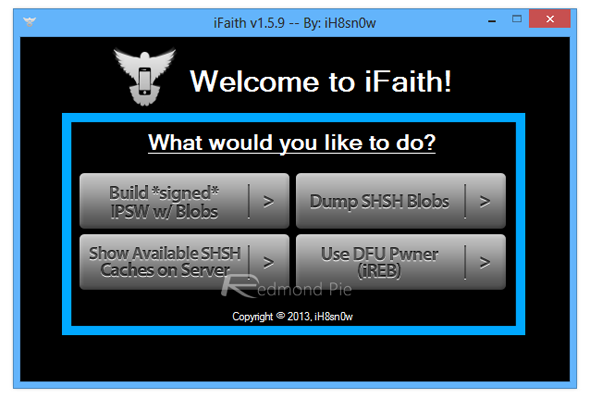
Step 3: Grab the latest version of iFaith (here), and also download iOS 6.1.3 or download iOS 6.1.2 firmware for iPhone 4, depending on which firmware you have saved blobs for to downgrade to. You will also need to retrieve your SHSH blobs from wherever you have happened to save them locally. If you previously had them saved on Cydia, you can make use of “Show Available SHSH Caches on Server” option in iFaith to save them on your HDD now.
Step 4: Fire up iFaith, and click "Build "*signed* IPSW w / Blobs". This will begin the process of creating your modified firmware file to which you will be downgrading.

Step 5: Locate your SHSH, and then select the stock iOS firmware file that you downloaded in Step 3 above. iFaith will then work its magic and create a custom IPSW.
Step 6: Follow the on-screen instructions to put your device into pwned DFU mode using iFaith’s built-in DFU Pwner:
- Hold Power and Home buttons at the same time for 10 seconds
- Release the Power button whilst continuing to hold Home until the screen is blank.
- Congratulations, you have successfully entered DFU mode.
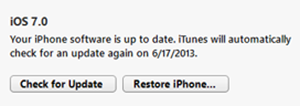
Step 7. Finally, Load up iTunes, select your iPhone, hold down the left SHIFT key and click on Restore iPhone at the same time, and browse to that custom firmware file created by iFaith. The restore will then proceed.

Once the restore is complete, your iPhone 4 will be back to iOS 6.x.
You can follow us on Twitter, add us to your circle on Google+ or like our Facebook page to keep yourself updated on all the latest from Microsoft, Google, Apple and the web.

