Here’s how to downgrade iOS 18 beta 1 and iPadOS 18 beta 1 to iOS 17.5.1 or iPadOS 17.5.1 on your compatible iPhone or iPad device.
Whenever Apple announces a big new iPhone or iPad software update it can be tempting to jump on board and install it early. But that can often lead to problems with the software sometimes full of bugs and other issues. If you do update to the new beta and find that you need to downgrade again, here’s what you need to do.

One of the most efficient and speedy methods to downgrade iOS 18 to iOS 17 is by utilizing a reliable third-party tool such as ReiBoot iOS System Repair. One of the significant benefits of using Tenorshare ReiBoot is its jailbreak-free nature. Unlike jailbreaking, which can introduce security risks and compromise device safety, Tenorshare ReiBoot provides a safer downgrading solution by completely bypassing such risks. This ensures that your device’s security remains intact while allowing you to achieve the desired downgrade.
To downgrade iOS 18 beta to 17 without iTunes using Tenorshare ReiBoot, simply follow these straight forward steps:
Step 1: Download and install Tenorshare ReiBoot on your computer. Then, connect your iPhone to the computer using a compatible cable.

Step 2: Launch Tenorshare ReiBoot and click on the “iOS Upgrade/Downgrade” option.

Step 3: Choose the desired firmware version that you want to downgrade to.

Step 4: Click on “Initiating downgrade” and wait for a few seconds.
Step 5: ReiBoot will automatically remove the iOS 18 beta and install the stable iOS version on your device. Once the process is complete, click on “Done.”

By following these steps, you can easily downgrade your iOS 18 beta to iOS 17 without the need for iTunes, using the convenient features provided by Tenorshare ReiBoot.
Alternatively, there’s a way to do it using iTunes or Finder as well, steps for which are as follows:
Step 1: Ensure that you have upgraded to, and are running, the latest version of iTunes on your PC or Mac. If you are running macOS Catalina or later, then you don’t need to worry about iTunes as this is all handled by the Finder app built directly into the OS.
Step 2: You will need to be in possession of the correct IPSW iOS/iPadOS 17.5.1 file that has been compiled by Apple and that is intended for your device. Will be downgrading to this file and can grab it from here.
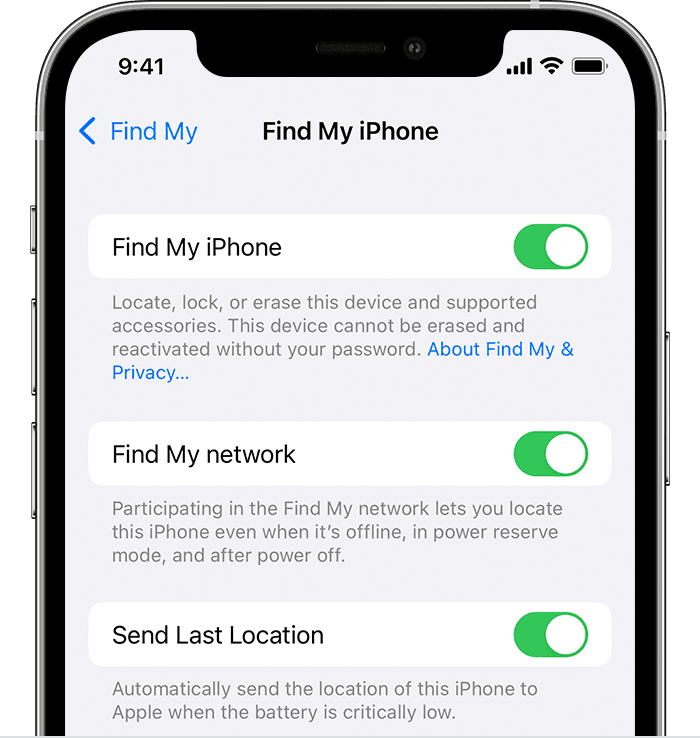
Step 3: Now, you will need to make sure that the Find My feature is disabled on your iPhone or iPad. In order to do that, launch Settings > iCloud > Find My and toggle the switch into the Off position. Input the Apple ID and correct password to confirm your decision.

Step 4: Connect your device to your PC or Mac. If iTunes doesn’t load automatically you’ll need to do it manually and make sure that it’s running. If you’re running Catalina or Big Sur, then just launch a Finder window.
Put your device into DFU mode using the quick guides below (if you don’t already know how to do it):
iPhone XR / XS / XS Max / 11 / 11 Pro / 11 Pro Max / 12 / 12 mini / 12 Pro / 12 Pro Max / 13 / 13 mini / 13 Pro / 13 Pro Max / 14 / 14 Plus / 14 Pro / 14 Pro Max /15 / 15 Plus / 15 Pro / 15 Pro Max, or 2018+ iPad Pro owners can follow this guide.
Step 5: With the DFU mode step out of the way, head into iTunes or Finder and press and hold the Option key on a Mac or the Shift key on a PC, and click the Restore iPhone/iPad option.
Step 6: Choose the IPSW file (iOS/iPadOS) that you downloaded earlier in the process. Exercise some patience and allow iTunes/Finder to go through the standard process and leave you with an iPhone or iPad that has been downgraded from iOS/iPadOS 18 to the version included within the IPSW file that you’ve chosen.
You may also like to check out:
- Download: iOS 18 Beta 1 IPSW Links For iPhone And iPad Released
- iOS 18 Beta 1 OTA Update Download: Here’s How To Install It
- iOS 18 Public Beta 1 Release Date Announced Alongside iPadOS 18, macOS 15, tvOS 18 And More
You can follow us on X, or Instagram, subscribe to our YouTube channel and even like our Facebook page to keep yourself updated on all the latest from Microsoft, Google, Apple, and the Web.

