Facebook. Love it or hate it, it’s not going anywhere any time soon. In fact, Zuckerberg and his merry band of chronies are actively trying to update the social network’s web page, making photos and videos more prominent. It’s all about trying to offer a rich, multimedia experience to its users, which is probably why Facebook bought Instagram for all that money!
Speaking of Instagram, wouldn’t it be cool if you could merge the photo sharing network with Facebook in some sort of awesome, good looking way? Well, it’s funny you should say that!
Enter InstaCover.
One of the changes Facebook made recently is the addition of the cover to a user’s Timeline. Effectively a giant image, the cover sits at the top of a user’s timeline and is the first thing anyone sees when they visit that Facebook page. The problem is, it’s a bit of a funny shape, and chances are you’ve not got anything to fit it properly.
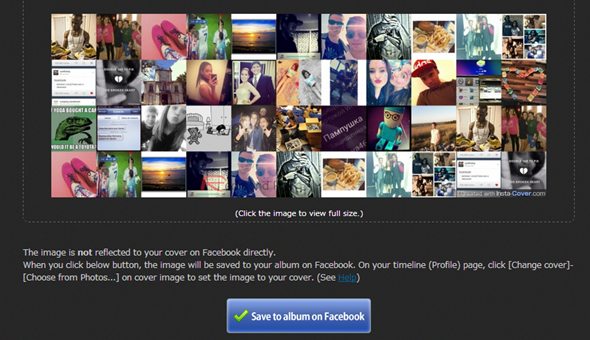
InstaCover solves that problem by taking a selection of Instagram photos and collaging them, creating a great cross-section of photos that make up the larger whole. If you’ve got the right photos to choose from, it can look absolutely awesome.
Making the whole thing is actually really simple and we have a guide to show you how it’s done:
Step 1: Just head on over to the InstaCover web site by pointing your browser to insta-cover.com.
Step 2: Click on Sign in with Facebook Account at the bottom of the page as shown in the screenshot below:

Step 3: Enter your Facebook credentials and allow the web app to sign in.

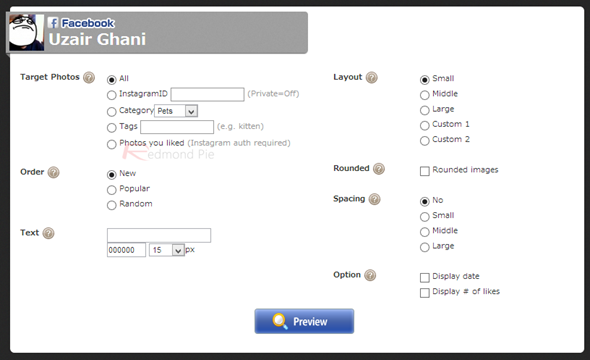
Step 4: Next, you’re faced with a collection of options which control which photos are used and how they are presented. Make sure to enter the correct set of tags, otherwise the process won’t move forward. Here, you don’t have to use your own photos if you don’t want to – you just enter the username that you want to pull your images from. Want to use Trey Ratcliffe’s images? No worries, but we’d rather use our own.

Step 5: Now you just choose whether your want to use larger or smaller thumbnails along with some less exciting options and ask for a preview. You’re almost done!

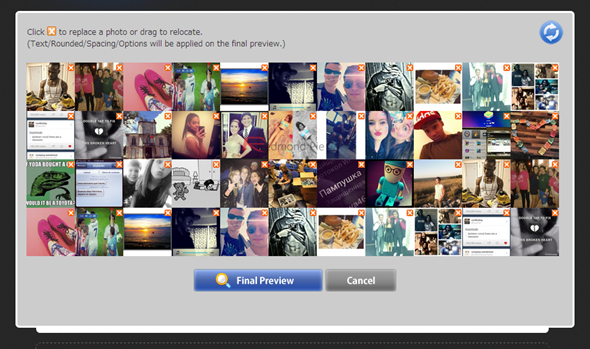
Step 6: All that’s left to do now is to remove any images you’d rather not see and InstaCover will replace them with others. Once you’re happy, InstaCover can then upload the final image to your Facebook account, ready for you to set it as your cover. Then you’re done!

InstaCover can also do the same thing for Twitter covers or backgrounds, too, so be sure to give that a try at the same time. It’s all free, so you’ve not got a great deal to lose!
You can follow us on Twitter, add us to your circle on Google+ or like our Facebook page to keep yourself updated on all the latest from Microsoft, Google, Apple and the web.

