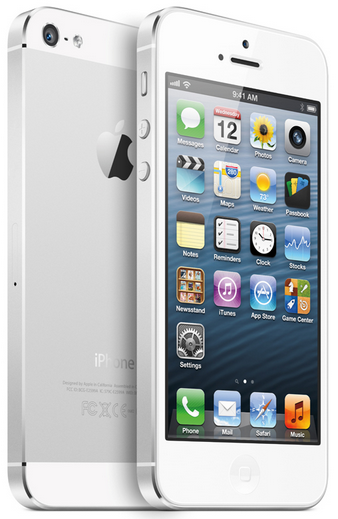
The iPhone 5 is a very noticeable 18% slimmer than the 4S. In order to reduce thickness, Apple had to completely overhaul previously used technology – like replacing the 30-pin connector with the new Lightning connector – or further reduce size of existing components, something you’ll notice when you realize that your shiny new iPhone doesn’t have enough room for your standard SIM or Micro SIM card; the iPhone 5 uses an even smaller Nano SIM card.
Now, there are two ways of going about getting your Nano SIM card. The first thing to do is to visit your wireless network’s local customer service center and get them to replace your current SIM with a Nano SIM, or you can follow the guide after the jump and turn your SIM into a Nano SIM at home.
The guide is very simple and straightforward. You will require the following apparatus:
- A printer
- A4-sized page
- Tape
- Ruler and marker
- Scissors
- Sandpaper or file
When you are in possession of these items, you have my permission to slice (your SIM card).
Step 1: Print the PDF we’ve linked here at 100% scale on an A4 page.
Step 2: Place your current SIM card (Mini or Micro) on the designated area. If you have a Mini SIM, place it on the second highlighted area. If you have Micro SIM, place it on the third and last.
Step 3: Firmly stick your SIM to the highlighted outline using a piece of tape. Be sure to align the edges properly.
Step 4: Use a ruler + marker to accurately mark the five lines along which you have to cut.
Step 5: Cut it! Be very careful. Take things slowly. You may damage your card if this isn’t done properly.
Step 6: Smooth out the edges of your freshly-cut Nano SIM by using sandpaper or a file. Again, be very careful in this step as it may damage the SIM card’s circuitry if you sand the SIM more than needed.
Voila! You now have a Nano SIM that should, technically, work with an iPhone 5.
This is, of course, not a completely foolproof method. There is a chance that you may permanently damage your SIM card, so proceed with extreme caution. If you don’t have any backup SIM to use with your current phone, I would highly suggest going through the effort of visiting your local customer service center; it’s better than being stuck without a phone. Redmond Pie will not be held responsible if you damage your SIM card in the process of following this guide.
As I see it, the Nano SIM is the smallest SIM cards we will have for a while. There is virtually no area left on the SIM that isn’t the contact area. The next generation of SIM cards – I’m betting they’ll be called “pico SIM cards” – will have to reduce the contact area itself rather than cutting off the area around them.
You can follow us on Twitter, add us to your circle on Google+ or like our Facebook page to keep yourself updated on all the latest from Microsoft, Google, Apple and the web.

