Here’s how you can check which apps on your Android device have Device administrator privileges and remove suspicious ones instantly. Read on after the jump for the complete steps.
Device Administration is a feature that first made its way onto the Android platform with the introduction of Android 2.2 Froyo. It basically introduced an Android Device Administration API in the attempt to offer support for enterprise applications. Usually users are prompted by apps to provide the Device Administration privileges which in return grants access to the API.

Here are the steps to help check which apps have been granted these rights and remove suspicious ones.
Requirements:
Android 2.2 Froyo or above.
Instructions:
Step 1: Open the Settings app on your Android device, and scroll all the way down to Security and tap on it.
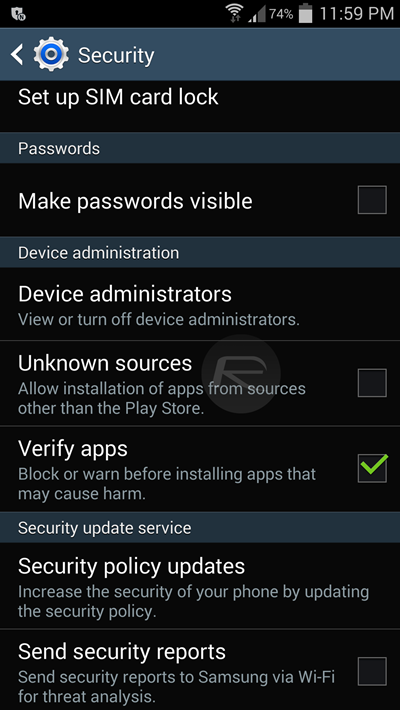
Step 2: Look for an option named ‘Device administrators’ or ‘All device administrators’, and tap it once.
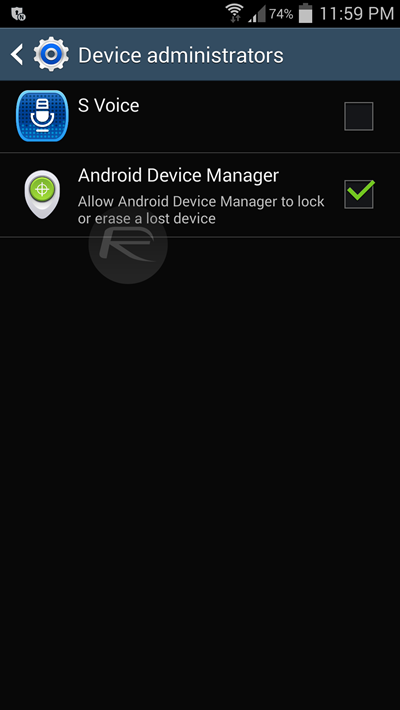
Step 3: You should now be seeing all the administrators listed with their name, as well as a short description of what those administrators do. Notice the check marks next to the names? These are the administrators that have been enabled. You can disable or enable any administrator on the list here.
That said, Android isn’t exactly malware resistant, and there have been malicious apps that won’t show up under ‘Device administrators’. For such events, you can use the ‘Hidden Device Admin Detector’ from Trend Micro to fish out such apps.
Step 1: Download and install ‘Hidden Device Admin Detector’ from the Play Store here.
Step 2: Run the app, and simply hit the big ‘Click here to Scan’ button that is placed dead right in the center.
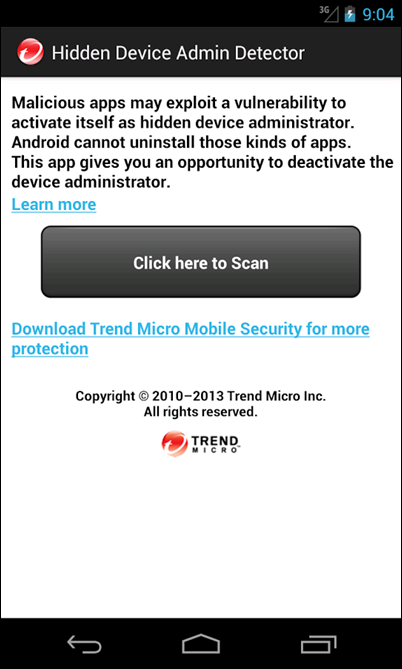
Step 3: Let the scan run its course. It may take a few minutes depending on the number of device administrators found. Once it finds any, it will show you an interface prompting you to make your changes. Simply uncheck the ones you wish to disable.
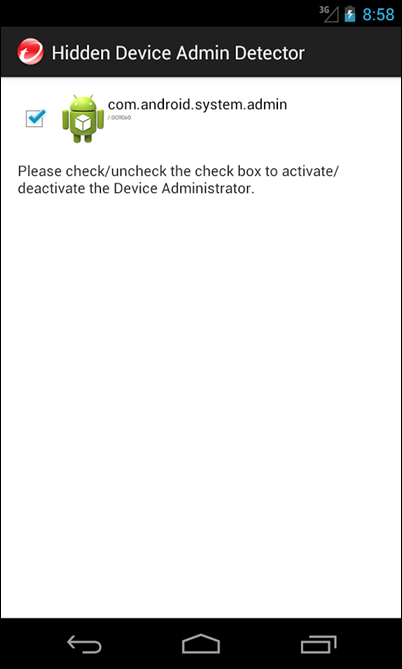
Step 4: Confirm the changes you are making and voila! No more hidden apps taking control of your Android device.
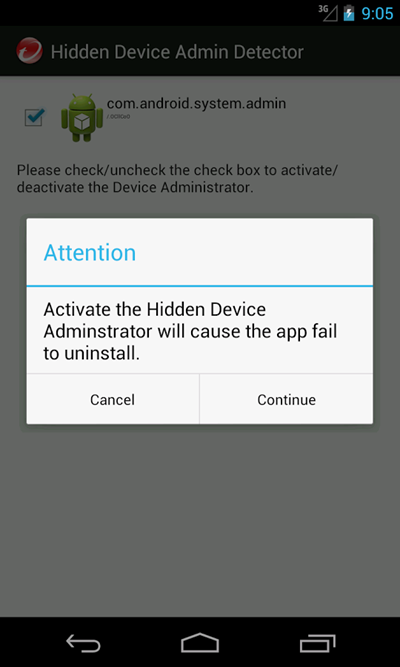
It’s always a good practice to keep things such as these in check from time to time. Furthermore, it’s recommended that you go through the list of permissions laid down by the developer before installing an app. You clearly don’t want to install a wallpaper app which needs access to your contacts and email, do you?
Was this tip helpful to you? Let us know what you think in the comments section below.
You can follow us on Twitter, add us to your circle on Google+ or like our Facebook page to keep yourself updated on all the latest from Microsoft, Google, Apple and the web.

