In case you don’t already know, there’s an implied understanding that if you explicitly decide to use Google’s “OK, Google” service for voice searches, then you understand that your voice commands are going to be recorded and stored by the company.
With that said, given the fact that Google’s digital assistant has a keyword to activate it in a hands-free manner, does that mean that accidental activations could potentially lead to discussions being saved inadvertently? It seems that that is indeed the case when it comes to Android devices.

It could simply be a case that the Android device hears something similar to the expected “OK, Google” command, or detects an accidental button press and decides to start listening for a command. In that instance, there’s a real possibility that conversation is being recorded and stored on your Google account in a separate location to normal search history.
If you aren’t exactly happy with Google holding that data, then here we’re going to take a look at how to find and view it, as well as deleting it should you see fit.
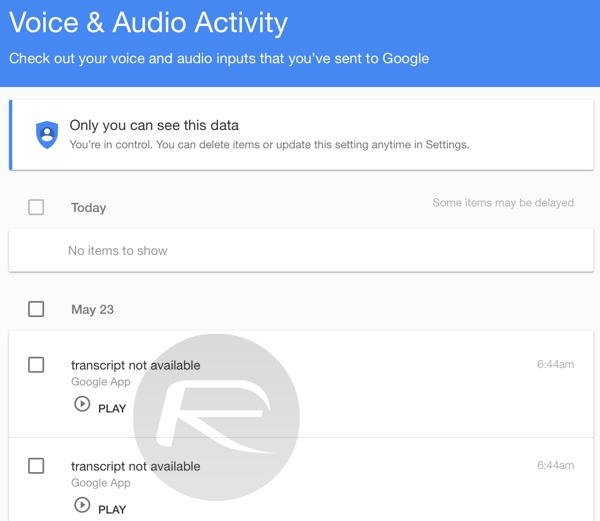
Step 1: First and foremost, it’s important to understand that Google isn’t actually recording everything that is ever said in earshot of an Android-powered device. That would be scary. Rather, when you utter the phrase “OK, Google”, the device jumps to life waiting for a command, and is therefore in record mode. To access a historical overview of what’s been recorded by your Android device, head to the dedicated Voice & Audio Activity page for your Google account. This may require you to authenticate with your Google account credentials.

The page allows you to “check out your voice and audio inputs that you’ve sent to Google”. These will be shown and collated in the main interface. View the results to see exactly what has been saved by Google through your audio interactions with your device. Hit “Play” to listen to the recordings.
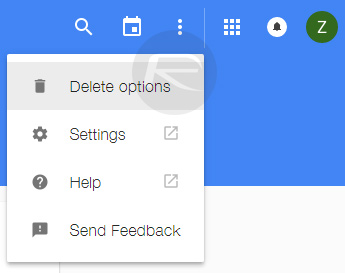
Step 2: To start the cleanup and deletion process, click the three vertical dots located at the top right of the display and select Delete options from the resulting menu.

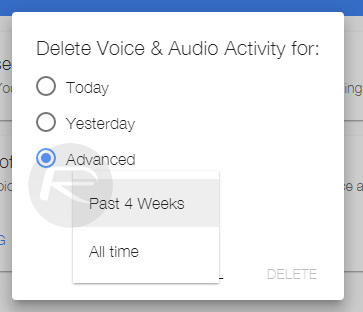
Step 3: Selecting Delete options will provide a modal overlay menu with the title “Delete Voice & Audio Activity for:”. You then have the option to select Today, Yesterday, or Advanced. Selecting Advanced, you will be able to delete the history from a specific date, the Past 4 Weeks, or All time.

Step 4: Once your decision has been selected with the radio box, hit the Delete button to process the removal of saved audio content.
That’s it, if you chose to remove all previous voice search history, you have a clean slate to start from now.
You may also like to check out:
- Google Records Every Place You Go With Your iPhone Or Android, Here’s How To Stop This
- Download MovieBox On iOS 9 / 9.2.1 / 9.3.2 Without Jailbreak
You can follow us on Twitter, add us to your circle on Google+ or like our Facebook page to keep yourself updated on all the latest from Microsoft, Google, Apple and the Web.

