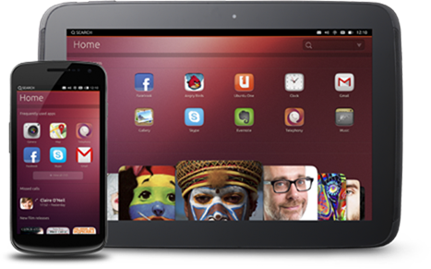
Canonical had promised the availability of its fabled (and much anticipated) Linux operating system for mobile devices, christened Ubuntu Touch, for Android-based Nexus devices starting February 21, and they have made good on their commitment. The developer preview of Ubuntu Touch was made available for download a few hours earlier, and when we reported that for you, we, too, made a promise for a guide on how to install the preview on your Android powered Nexus device. Well, without further ado, here we go. This article will lay down the steps for getting Ubuntu Touch Developer Preview up and running on your Galaxy Nexus, Nexus 4, 7 or 10.
Before we get to the actual process, do note that Ubuntu Touch is a developer preview as of this writing, and hence, not yet ready to serve as a daily driver. Should you not have a spare Nexus device to play around with, it’s hardly recommended to give this a try, since you may end up losing a good deal of core functionality. Please proceed at your own discretion.
Requirements
First and foremost, you’ll need a supported Android device with a supported stock firmware. As of now, these devices are supported:
- Galaxy Nexus (takju or yakju)
- Nexus 4 (occam)
- Nexus 7 (nakasi or nakasig)
- Nexus 10 (mantaray)
You’ll also need a Linux based desktop computer (preferably running Ubuntu) for the installation process.
Procedure
Step 1: To begin with, you need to set up the Ubuntu Touch Preview Tools PPA on your computer, which can be found at the source link at the end of this post. Under Terminal, run the following commands:
sudo add-apt-repository ppa:phablet-team/tools
sudo apt-get update
sudo apt-get install phablet-tools android-tools-adb android-tools-fastboot
(Steps 2 through 4 apply only if your device’s bootloader is locked. If you’re already unlocked, skip to step 5)
Step 2: Boot your Nexus device in bootloader mode, and plug it to the computer using a USB cable.
Step 3: On the computer, fire up a new Terminal window and enter the following command:
sudo fastboot oem unlock
Step 4: Accept the unlocking terms and conditions on your device’s screen, reboot once done.
Step 5: Boot your device into Android, and enable USB Debugging through the Developer Options in Settings. Plug the device back into the PC using the USB cable.
Step 6: This step is where you’ll actually flash the Ubuntu Touch image to your device, which will wipe all data. Hence, it’s always advisable to take a backup beforehand to avoid any unpleasant surprises.
Assuming that you’d followed prior instructions to the letter, you should be good to go. With the device connected to the PC via USB cable, run the following command in Terminal:
phablet-flash –b
This will perform a full bootstrap on your device, flash the latest Ubuntu Touch build and perform a reboot, after which your Nexus device will boot in Ubuntu Unity shell.
Congratulations, you have successfully flashed Ubuntu Touch Developer Preview on your Nexus 4, 7, 10, or Galaxy Nexus. Enjoy! For more details and technical assistance, check out the source link below.
(Source: Ubuntu)
You can follow us on Twitter, add us to your circle on Google+ or like our Facebook page to keep yourself updated on all the latest from Microsoft, Google, Apple and the web.

