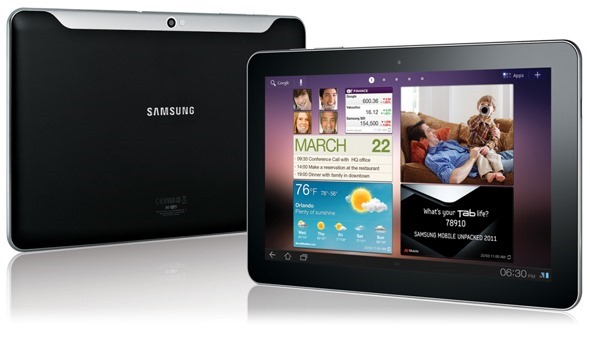
In the Android ecosystem, the first ever tablets (other than the first experimental builds like original Galaxy Tab and HTC Flyer) ran on Honeycomb, Android 3.0, which was tailor-made to suit the tablet devices’ larger screens. Unfortunately (or not), Android 3.0 didn’t really see much glory for two reasons. One, it was rather buggy in itself, and two, when Ice Cream Sandwich was released, it unified both tablet and smartphone versions of the Android ecosystem, making it redundant to have a separate OS in the first place. For the same reasons, the said Android version didn’t see much developer love, either.
We have come long past that point, but the fact remains that Samsung’s Galaxy Tab 8.9 P7310 was the Korean manufacturer’s flagship device on Honeycomb. Thanks the the platform’s own failure, as well as the introduction of the newer tabs like Galaxy Tab 10.1, Sammy didn’t really care much to upgrade the older sibling. However, the community over at XDA-Developers hasn’t treated the device the same way, and just recently, unofficial CyanogenMod 10.1, running Android 4.2, has been released for the P7310. Although it’s far from a stable and daily-usable build, it’s still a good start, and things are definitely going to improve in the future.

In this article, we’ll guide you on how you can flash the unofficial CM 10.1 to your Galaxy Tab 8.9.
Warning
Please note that this is an experimental build, and not only are quite a few features not working, you won’t even be able to revert back to CM9 or CM10 with ease. You may want to try it out only if you know how to play around with ADB.
Also, follow the instructions at your own risk. We will not be held responsible for any damage to your device as a result of following this method.
Requirements
- Unofficial CyanogenMod 10.1 for Samsung Galaxy Tab 8.9
- Google Apps for Android 4.2
- ClockworkMod Recovery on the device
- At least 50% battery power remaining on the tablet
Procedure
Step 1: Download the CM 10.1 package and Google Apps for Android 4.2 ZIP from the source link below, and place them in the root of your tablet’s internal memory/SD card.
Step 2: Reboot the tablet into CWM recovery using hardware buttons, and perform a wipe data/factory reset. Do a Dalvik Cache wipe as well.
Step 3: In recovery, choose Install ZIP from SD card, followed by Choose ZIP from SD Card. Point to the CM 10.1 package and let it flash.
Step 4: Follow the above steps and flash the GAPPS package to your Galaxy Tab 8.9
Step 5: Reboot the device.
That’s it. You are now running Android 4.2 based unofficial CM 10.1 on your P7310 Galaxy Tab 8.9.

For more details, downloads and troubleshooting, head over to the source link below.
(Source: XDA-Developers forum thread)
You can follow us on Twitter, add us to your circle on Google+ or like our Facebook page to keep yourself updated on all the latest from Microsoft, Google, Apple and the web.

