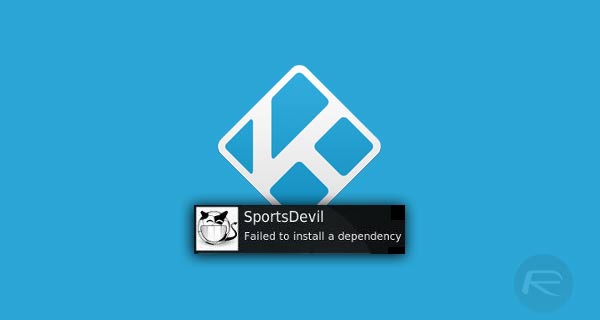
Here’s how to fix Kodi Failed to install dependency error in Kodi version 17 or 17.6 Krypton 2018 edition running on a compatible platform.
If you have a Kodi installation and have been experiencing errors around failing to install a dependency when installing addons, then you are probably at the end of your tether trying to not only work out the cause of the problem but also fix it. If you are infuriated with this problem and are running Kodi 17 / 17.6, then carry on reading for what will hopefully be an immediate fix to your problem.
Step 1: With the Kodi installation open, click or tap on the gear icon to head into Settings. You will then need to head across and select the File manager option.
Step 2: When inside of the File manager, double-click on Add source and then select the entry field which will contain the wording <none>. This will let you enter the details of the source in. Enter the following: http://fusion.tvaddons.ag and select OK.
Step 3: Use the Enter a name for this media source option to give it a name of your choosing. Select OK again. You can now navigate back to the main Kodi home screen.
Step 4: On the main home screen, select the Add-ons option from the main menu system. In the top left-hand corner select the box icon which represents the Add-on Browser.
Step 5: Select the Install from zip file option and then select the media source based on whatever you called it in Step 3 above.
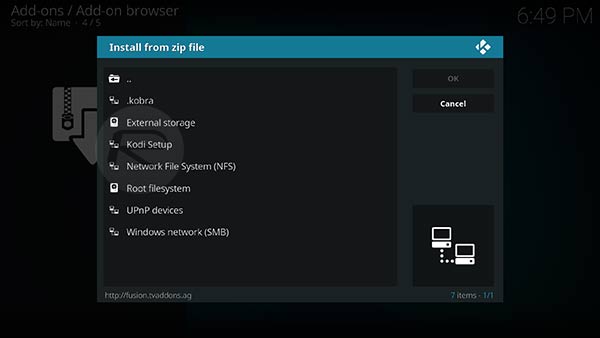
Step 6: Select kodi-repos and then english. Scroll down until you find the repository called repository.xbmchub-1.0.7.zip. Select it.
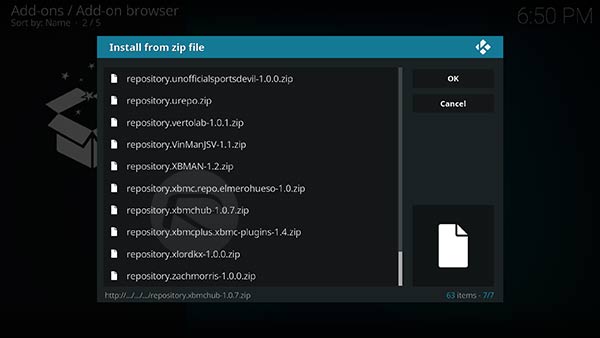
You then need to wait until Kodi gives you a notification saying that the Add-on has been installed.
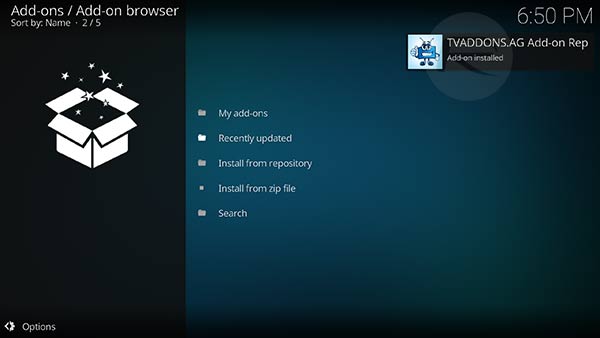
Step 7: Now, select the Install from repository option and choose the TVADDONS.AG Add-on Repository option. Select Program Add-ons, and then select Indigo.
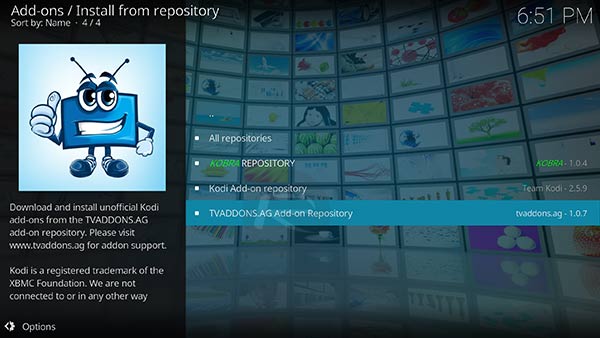
Step 8: When the Indigo page is brought up, select the Install option at the bottom of the interface. When it is installing, select the Config Wizard option and repeat the same installation process.
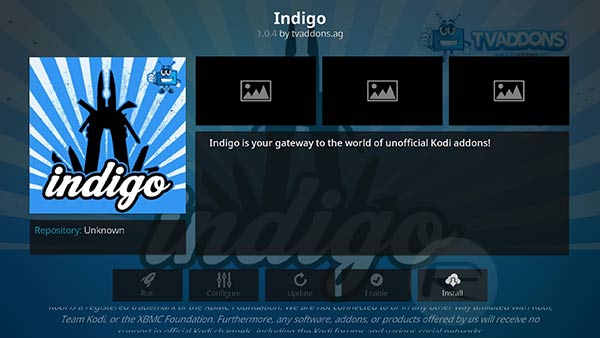
Step 9: Move back to the root of the Add-ons section and select Indigo and then select Config Wizard and select Install.
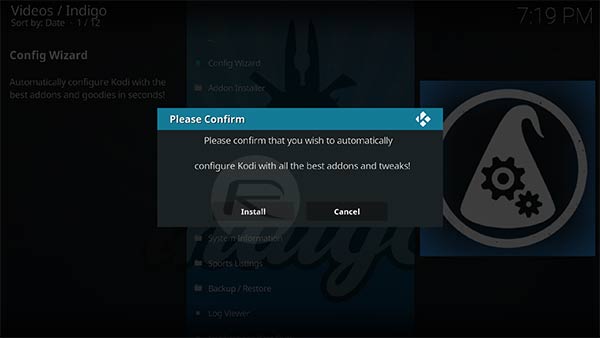
Step 10: Once that is actually installed by Kodi, you will then need to restart Kodi and you should be good to go without experiencing any of the problems that previously were in place.
Update: With http://fusion.tvaddons.ag repo now dead, you can try http://fusion.tvaddons.co repo in its, or more specifically our updated Indigo guide here.
You might also like to check out:
- Start Kodi On Boot Automatically On Android And Fire TV Stick, Here’s How
- The Best Kodi 17 Krypton Skins / Themes [2017 Edition]
- The Best Kodi Addons For 17 / 17.1 Krypton 2017 Video Streaming
- Fix Kodi Screen Size Issue On 17 / 17.1 Krypton, Here’s How [2017 Edition]
- Fix Kodi 17 / 17.1 Krypton Crash Issue, Here’s How [2017 Guide]
- Fix Kodi 17.1 Krypton Buffering Issue, Here’s How [2017 Edition]
- Fix Or Clear Kodi Cache Full Issue On 17 / 17.1 Krypton, Here’s How
- Install Kodi VPN Addon On Fire TV Stick Or Android 2017 For Free, Here’s How
You can follow us on Twitter, add us to your circle on Google+ or like our Facebook page to keep yourself updated on all the latest from Microsoft, Google, Apple and the Web.

