So you have an iPhone 4 or iPhone 3GS (New Bootrom), running iOS 4.0.1, with SHSH blobs saved on Cydia, and you want to restore your iPhone again to iOS 4.0.1. Now that Apple has stopped signing iOS 4.0.1, you wont be able to restore your iPhone 4 on iOS 4.0.1 by simply pointing iTunes to iOS 4.0.1 ipsw file. Because if you do so, iTunes will throw an error: “This iPhone [your name] iPhone could not be restored. This device isn’t eligible for the requested build.
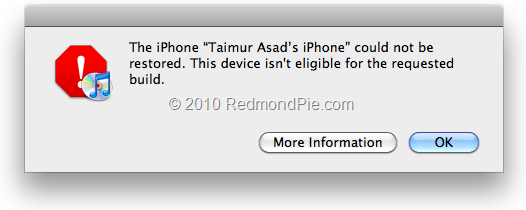
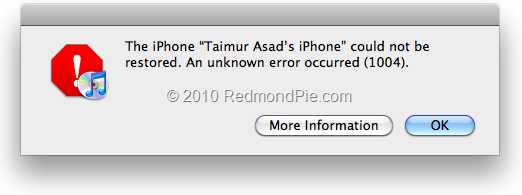
Now to fix this error, you will have to make a couple of changes in your system’s “host” file, by pointing it towards Cydia server instead of Apple’s. Also this is not it, you may also receive another error during restore: 1004, or 1015 from iTunes saying: “The iPhone [you name] iPhone could not be restored. An unknown error occurred (1004)”.
The following step by step instructions will guide you on how to fix these errors so that you can restore any of your new iOS devices like iPhone 4 or 3GS to iOS 4.0.1 successfully.
Step 1: Download the required iOS 4.0.1 ipsw firmware files from here.
Step 2: Put your device into DFU mode (not recovery mode).
- Connect your iPhone to your computer.
- Turn iPhone off.
- Start iTunes.
- Hold Power and Home buttons together for 10 seconds or so.
- Release Power button but keep holding the Home button until your computer recognizes a new USB device.
- iTunes will now recognize your iPhone.
Note: Your iPhone screen at this time should be blank (black in color), if not, then you are most likely in Recovery Mode, not DFU mode.
Step 3: Before you proceed, you must make sure that you have your SHSH blobs saved on Cydia for the firmware version you restoring or downgrading to. If you don’t have your SHSH files saved, you cannot downgrade or restore to iOS 4.0.1.
So now, what we will do is to trick iTunes into thinking that it is watching Apple servers, while in real, we are going to change the address to Saurik’s server.
- Navigate to C:\Windows\System32\drivers\etc\ and locate “hosts” file.
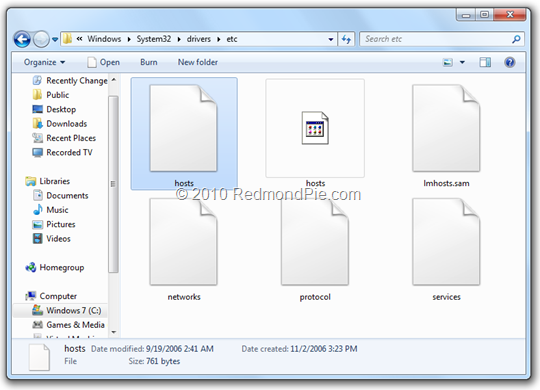
Mac OS X users can get to “/etc/” directory by going through “Go –> Go to Folder” from Finder.
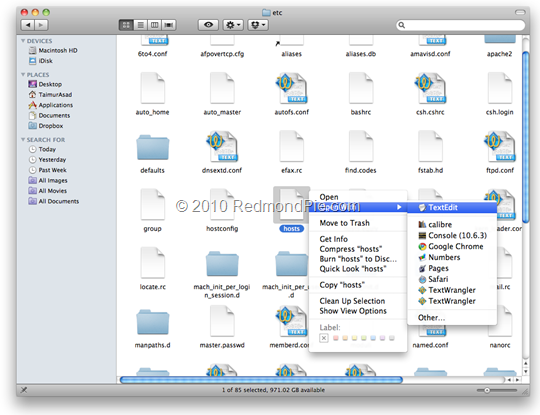
- Open this “hosts” file in Notepad (for Windows) or TextEdit (for Mac OS X) and add this
74.208.105.171 gs.apple.com
line as shown in the screenshot below:

Now simply save this file and you are good to go!
NOTE for Windows 7 and Vista: Start “Notepad” with Administrator privileges by right clicking on “Notepad” app, and click on “Run as Administrator“ option.
NOTE for Mac OS X: Make sure you have full read and write access on your account when you are saving the host file. If it still throws permission error, simply copy the host file to desktop, make the required changes, and then replace it with the original file in “/etc/” directory.
Step 4: You will now have to restore your iPhone to the firmware you downloaded in Step 1. Click on your phone icon from the sidebar in iTunes. Now press and hold left “alt” (option) button on Mac (Left “Shift” button on Windows) on the keyboard and then click on “Restore” (Not “Update” or “Check for Update”) button in the iTunes and then release this button.

This will make iTunes prompt you to select the location for your downloaded firmware file. Select that ipsw file and click on “Open”.
Step 5: Now sit back and enjoy as iTunes does the rest for you. This will involve a series of automated steps. Be patient at this stage and don’t do anything silly. Just wait while iTunes installs firmware on your iPhone. Your iPhone screen at this point will be showing a progress bar indicating installation progress. Now at some point, iTunes will probably throw 1004 or 1015 error at you. This is normal, just ignore this error as the firmware has already been successfully installed on the device.
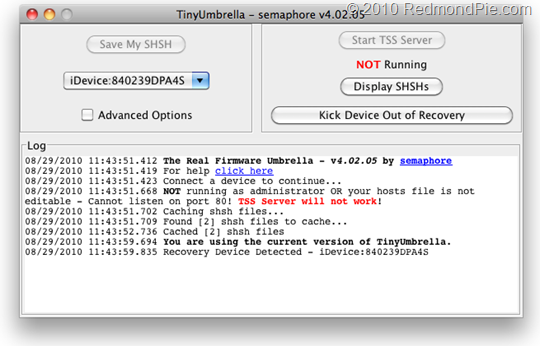
Step 6: Your iPhone at this point will be stuck in Recovery Mode, showing that “Connect to iTunes” screen. To exit your device from Recovery Mode, download this program called TinyUmbrella (Windows / Mac). Run it and the click on “Kick Device Out of Recovery” button. Your device will now restart normally.
This is it, you should now be able to jailbreak and unlock your device on iOS 4.0.1 with JailbreakMe, guides for which can be found below:
- How to Jailbreak iPhone 4, 3GS on iOS 4.0.1 with JailbreakMe 2.0
- How to Jailbreak iPod touch 3G and 2G on iOS 4.0 with JailbreakMe 2.0
- How to Jailbreak iPad on iOS 3.2.2 with JailbreakMe 2.0
Once you are done with the jailbreak, you can follow our step by step guide posted here to unlock your iPhone on iOS 4.x, on any baseband using Ultrasn0w.
You may also like to check out:
- How to Jailbreak iPhone 4, 3GS, iPod touch 3G / 2G, and iPad 3.2.1 with JailbreakMe 2.0
- How to Unlock iOS 4.0.1 on iPhone 3GS, iPhone 3G [Guide]
- How to Unlock iOS 4 with Ultrasn0w and Blacksn0w on 05.13.04 Baseband [Guide]
- How to Jailbreak and Unlock iOS 4.1 on iPhone 3G and iPod touch 2G with Redsn0w [Downgrade]
- How to Jailbreak iOS 4.0 on iPhone 3GS, iPhone 3G and iPod touch 2G using Redsn0w, PwnageTool 4.0 (Windows)
You can follow me on twitter or join our facebook fanpage to keep yourself updated on all the latest iPhone jailbreaking and unlocking releases.

