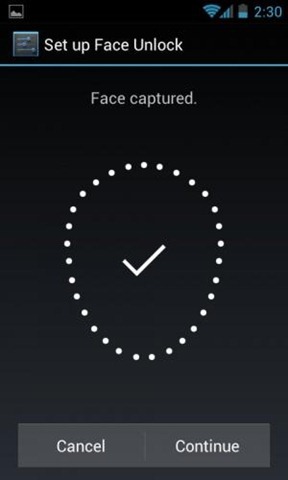
Nexus S-toting Android enthusiasts who were feeling left out on not getting Face Unlock for their device in the Android 4.0.3 Ice Cream Sandwich will be pleased to know that an independent developer has managed to port the feature to the Nexus S and as included it in a custom ROM. We’ve got the step-by-step guide on how to flash this ROM right after the jump!

From Android Central:
Because of the Samsung Nexus S’ VGA front camera, face unlock was left out of the official and AOSP builds of last year’s reference phone. You know where this is going — the files have been yanked out of the Galaxy Nexus and face unlock is working in all it’s gimmicky goodness. It’s even working with a beard and glasses.
DISCLAIMER: Redmond Pie will not be held responsible if you lose data or your device gets damaged in the following of this guide. Proceed at your own risk.
Note: This guide is for the GSM Nexus S only. If you’re using a CDMA-based Nexus S, you can check out its official thread here for instructions.
To follow this guide, your Nexus S must be rooted, have ClockworkMod Recovery flashed and enough space on internal storage to hold all the required files.
Step 1: Download the following .zip files first from the official thread:
- GSM Nexus S Android 4.0.3 ICS With Face Unlock ROM
- Google Apps
- SuperUser
- Tweaked boot image and kernel
- Face Unlock
Do not extract them.
Step 2: Place all of these files directly under /sdcard directory on your Nexus S.
Step 3: Shut down your Nexus S. Press and hold Volume Down + Power buttons to boot into ClockworkMod Recovery.
Step 4: Take a nandroid backup from backup & restore > restore. This may come handy later on if you wish to revert back to your current set up.
Step 5: From the main menu, wipe data/factory reset. Also be sure to
Step 6: This is the part where we flash all the required .zip files. You must separately flash them from install zip from sdcard > choose zip from sdcard > [.zip file] and in the following order:
- GSM Nexus S Android 4.0.3 ICS With Face Unlock ROM
- Google Apps
- SuperUser
- Face Unlock
Step 7: Once you have flashed the four files, select reboot system now from the main menu.
Step 8: After the phone starts, you must reboot to recovery again (as mentioned in Step 3) and then flash the tweaked boot image+kernel from install zip from sd card > choose zip from sd card > [.zip file]
Step 9: Reboot phone again from main menu (as mentioned in Step 7).

If you followed the steps correctly, Android 4.0.3 Ice Cream Sandwich with Face Unlock will be installed on your Google Nexus S.
You can follow us on Twitter, add us to your circle on Google+ or like our Facebook page to keep yourself updated on all the latest from Microsoft, Google, Apple and the web.

