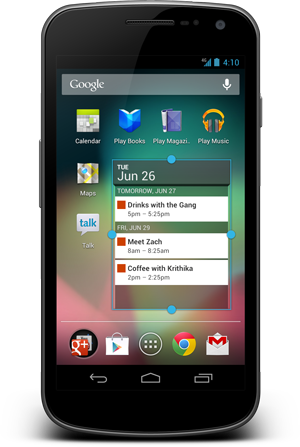
If the revelation by Google is anything to go by, then the official Jelly Bean update would be hitting our Galaxy Nexus and Nexus S devices in July. But luckily, and at this very moment, you can download a image of the Android 4.1 update for your Galaxy Nexus, and guess what? You can flash it right now!
The official OTA download released yesterday is the preview build of Android 4.1 which is meant for developers who are attending Google I/O, and will only run on devices that Google handed over to them yesterday. But all thanks to an XDA member named bigxie, for compiling an image of the Jelly Bean ROM which is flashable on existing GSM Galaxy Nexus devices via ClockworkMod Recovery. It is also important to note that this is not the final build and there are quirks and bugs around the corners.

Android 4.1 Jelly Bean was announced at Google I/O and is the next big version of Android and is due to be rolled out in July for the Galaxy Nexus and the Nexus S. If you have a handset from a manufacturer such as HTC or Samsung, then you might have to wait a while before the update hits your device. Here’s one reason why you should always get a Google-branded device!
The steps to install the ROM right now are relatively simple, provided that you are rooted and have ClockworkMod Recovery installed on your device, you can simply follow the steps given below and you’ll be running Android 4.1 Jelly Bean on your Galaxy Nexus in no time.
Note: Keep in mind that this update is for the GSM Galaxy Nexus only.
DISCLAIMER: Redmond Pie will not be held responsible if you lose data or your device gets damaged in the following of this guide. Proceed at your own risk.
Step 1: Download and flash ClockworkMod Recovery by heading over to this link.
Step 2: Download the Jelly Bean image, the root fix and radio from this thread over to XDA. Place all the downloaded files in the root directory of your Galaxy Nexus.
Step 3: Power off your device and turn it back on while holding down the Volume Down and Power buttons and you’ll boot directly into ClockworkMod Recovery.
Step 4: Take a nandroid backup of your device.
Step 5: From the main menu of CWM, wipe your data, do a factory reset and wipe Dalvik cache.
Step 6: Now select install zip from sdcard > choose zip from sdcard > select the Jelly Bean zip you downloaded and placed in your sdcard in Step 2.
Step 7: Now repeat Step 6, but this time flash the radio file.
Step 8: Again, repeat Step 6 and this time flash the root fix. Note: This step is not necessary if you are not looking forward to remain rooted after the update.
Step 9: Once you’re done flashing the three files, simply select reboot system now from CWM’s main screen and you’ll boot right into Android 4.1 Jelly Bean on your GSM Galaxy Nexus.
To wrap things up, the first device ever on the planet to ship with Android 4.1 Jelly Bean will be the Nexus 7 tablet which was also announced at I/O yesterday. Aimed to compete with the Kindle Fire, the Nexus 7 is a $199 tablet with a 7-inch display, a quad-core Tegra 3 processor and bunch of other features which you aren’t probably expecting from a tablet of this kind.

Android 4.1 Jelly Bean is rather a point update over ICS with many performance improvements under the hood. The worse feature of Android which has existed for quite a while now – lag – has finally been removed once and for all in this release and brings a buttery smooth UI experience to the end-user.
You can follow us on Twitter, add us to your circle on Google+ or like our Facebook page to keep yourself updated on all the latest from Microsoft, Google, Apple and the web.

