Back in September last year, I wrote this article about accessing FTP sites using Windows Vista. I then completely shifted to Windows 7 (starting from M3 Build which was released at PDC 2008) only to find out that I couldn’t get the FTP site location thing to work in Windows 7 as it did for me in Windows Vista. This functionality was probably broken or disabled by Microsoft on purpose for testing in all the builds up to Windows 7 Build 7057. But starting from Windows 7 Build 7077, this has been fixed and you can now access any FTP site from within Windows 7 itself without having to install any third party software.
The procedure for creating your FTP site location in Windows 7 is similar to what it was in Windows Vista. Here’s how to create a FTP site location in Windows 7:
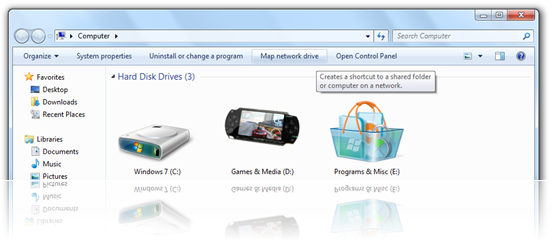
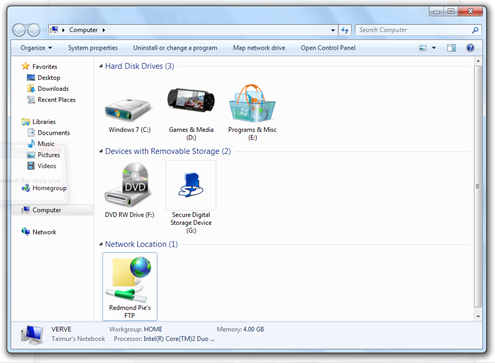
Step 1: Click on Start Orb ![]() and then click on "Computer".
and then click on "Computer".
Step 2: Click on “Map network drive”..
Step 3: "Map Network Drive" window will open. Now click on the link "Connect to a Web site that you can use to store your documents and pictures."
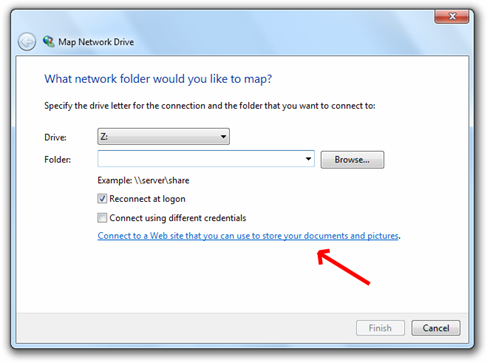
Step 4: Now simply follow the step by step wizard to add a new network location. Select"Choose a custom network location" when given the choice of where to create this network connection.
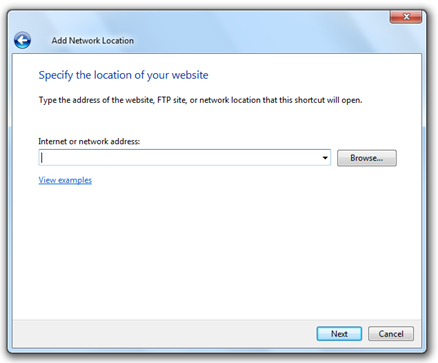
Step 5: Type your ftp address e.g. ftp://ftp.yoursite.com. Specify a user name and password if required.
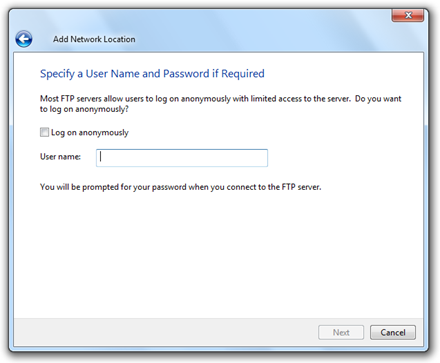
Step 6: Last but not the least, give your newly created network location a name and you are done! ![]()
Feel free to ask me any question should you run into any problems setting up your FTP site in Windows 7.

