Here’s how to free up over 20GB of storage space on your PC after the installation of Windows 10 Creators Update.
If you are running a PC or other type of device running Windows 10, then the chances are that you have already taken the opportunity to upgrade to the wonderful new Creators Update, as officially made available by Microsoft through Windows Update yesterday. As good an update as the Creators Update is, did you know that moving up in the world to a new version of Windows actually forces the system to store data belonging to previous installations of the OS in case a rollback is needed? Thankfully, you can actually claim that data back.
It makes perfect sense that Microsoft would have some kind of system in place to simply the rollback process if something went wrong with the update. However, given how impressive an update the Creators Update actually is, there should be no real reason why you’d need, or want, to rollback to a previous version, which means it’s time to reclaim that space back for your own use.
Step 1: Using your Windows 10 ninja skills, put yourself into a position where you can search for something in the Start menu universal search functionality. Type Disk Cleanup into the search and launch the tool.
Step 2: As the name suggests, Disk Cleanup is a tool which allows you to delete files which Windows deems necessary to temporarily store on the hard disk of the installed device. It will prompt you to select the drive to cleanup, so select the one where Windows 10 is installed. It is likely to be the C: drive, but be aware that this could be different if you have a custom install or have taken any opportunity to move installation files around onto other drives.
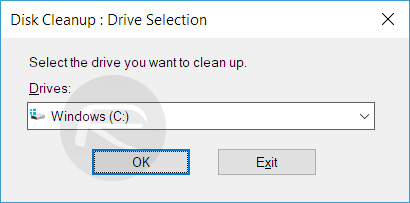
Step 3: With the relevant drive selected, click OK, and the tool will launch.
Step 4: Here, simply click the Clean up system files button to proceed with cleaning up that old update data.
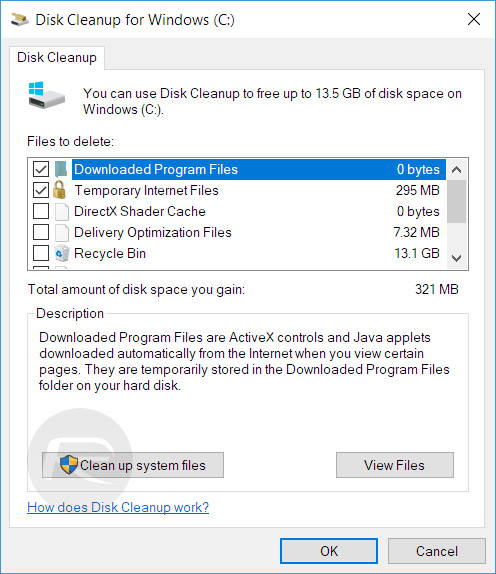
Step 5: You will once again be asked to choose the drive of your choice, so once again, select the drive where Windows 10 is installed. C: drive in our case.
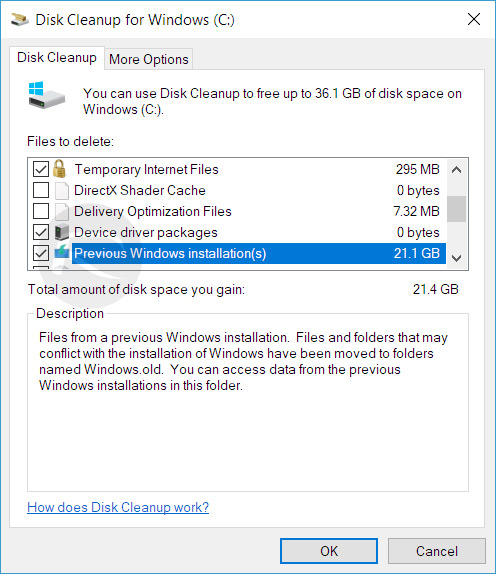
Step 6: Now you will be presented with a list of options, which are basically things that you are able to clean up within this system files scenario. You will notice Previous Windows installations listed along with the storage it’s taking up. Simply select that item, and then hit the OK button.
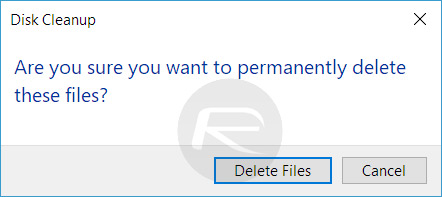
Step 7: When you’re asked if you’re sure about deleting these files permanently, click the Delete Files button.
 .
.
Step 8: This will initiate the process, but quickly prompt you with another alert detailing that you will not be able to roll back to a previous version after this. Hit Yes, and the tool will continue with the process of cleaning up the disk and deleting all data from previous Windows versions.
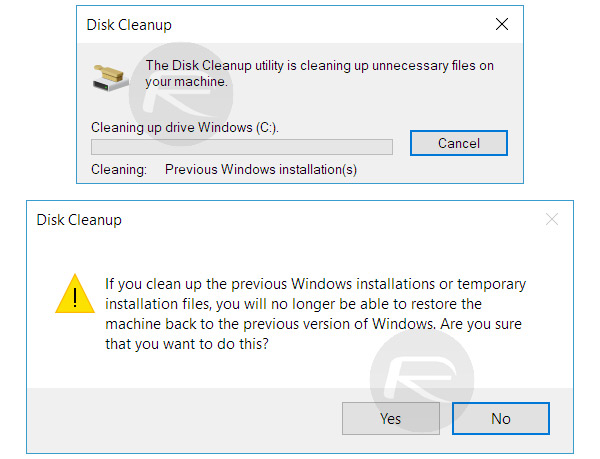
When the system is finished running through the temporary files, and deleting all necessary instances of old versions of Windows, you should be able to instantly check to see how much storage space you have gained at the end of this process, in our case it was over 20GB! Use this space wisely.
You may also like to check out:
- Download: Windows 10 Build 15063.138 KB4015583 Cumulative Update Released
- Fix Windows 10 Creators Update Install Stuck Issue, Here’s How
- Fix Windows 10 Creators Update Audio / Sound Issue After Upgrade, Here’s How
- Download Windows 10 Pro ISO File Without Product Key From Microsoft
- Download ISO: Windows 10 Creators Update 1703 Build 15063 Released
- Windows 10 Product Key And Activation: How To Find It And How It Works
You can follow us on Twitter, add us to your circle on Google+ or like our Facebook page to keep yourself updated on all the latest from Microsoft, Google, Apple and the Web.

