Here’s how you can download and test drive Android 5.0 Lollipop on your Windows PC. Complete steps on how to set it up can be found right here.
Android 5.0 is only available on a handful of devices – the Nexus 6, 9, 5 etc. to name a few – and the Lollipop OTA is yet to arrive for a huge bunch of users around the globe. Therefore, if you want to experience Lollipop before it makes its way to your smartphone, follow the instructions detailed below. It basically involves running the official Android 5.0 Lollipop emulator on your PC. Since the emulator is meant solely for developers and for testing purposes, don’t expect a full Nexus-like experience on your computer.
Requirements:
- A Windows based PC.
- Latest Java SE Development Kit Installed.
- Android SDK installed on your PC. Download the Android SDK (32-bit or 64-bit) from: developer.android.com/sdk/
Instructions:
Step 1: To begin, download the Android SDK from the link above. If you chose the packaged (zip file) version, extract the contents to a folder. However, if you downloaded the executable (.exe) setup file, run the setup and choose a directory to install the Android SDK to. Make sure you have Java installed, as the setup will inquire about it prior to the start of the installation process.
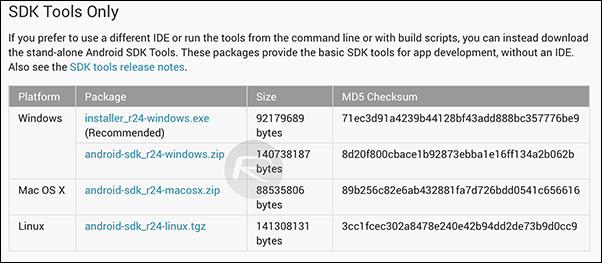
Step 2: Now run the Android SDK Manager (SDK Manager.exe) from where you either extracted the file contents, or installed to using the ‘.exe’ setup file.
Step 3: Now you should see the Android SDK Manager running. You will see an array of tools and APIs here, but you only need to select two items here: Android SDK Platform-tools and Android 5.0 (API 21). If you have a slower Internet connection, move onto the next step, otherwise skip to Step 5.
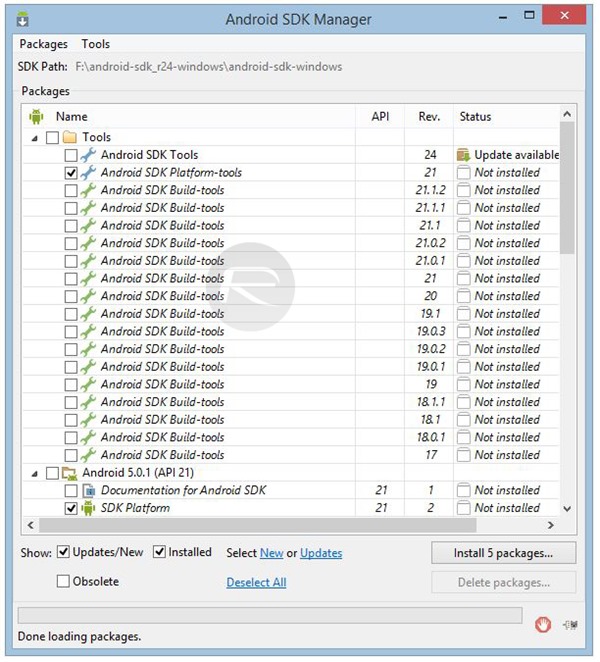
Step 4: Expand the Android 5.0 (API 21) section, and you will see a list of files. If you simply want to run the emulator, you do not require all of these files. Uncheck all files except for:
- SDK Platform
- ARM EABI v7a System Image
- Google APIs
- Google APIs ARM EABI v7a System Image
Scroll down and make sure no other item is checked.
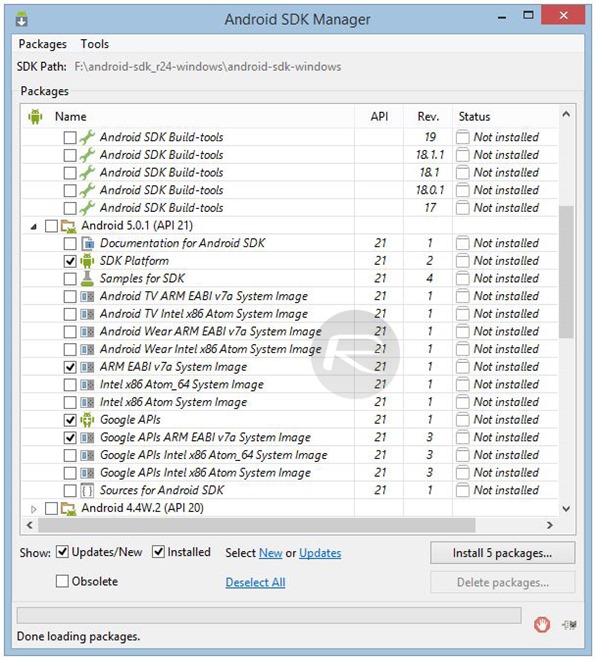
Step 5: Once the above listed items are checked, hit the Install button.
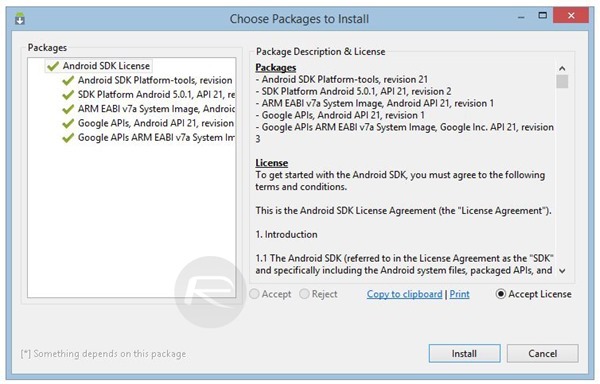
Step 6: You will be shown a brief of the packages you’re about to install, and will need to accept license and agreement to continue. Click Install which will begin downloading all the required files for running Android 5.0, and once downloaded, will be automatically set up on your PC.
Step 7: When the download is complete and the items are installed, open the Android SDK folder and run AVD Manager.exe.
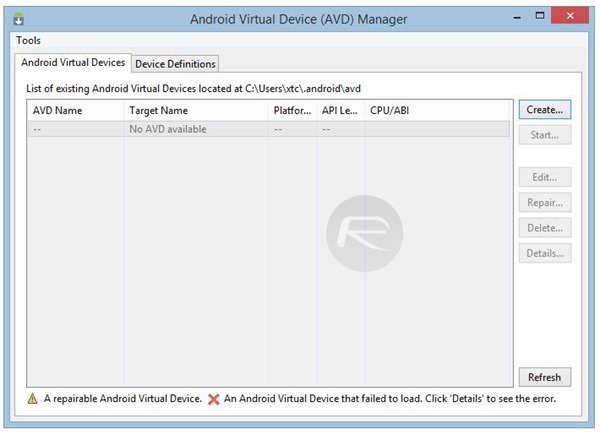
Step 8: After the program launches, hit the Create button, and you should see a "Create new Android Virtual Device (AVD)" window pop-up.
Step 9: Now we need to fill in some details. Select a device from the list as your virtual hardware, and select the Target as ‘Android 5.0 – API Level 21’ in case it is not set as such by default. CPU/ABI should be reading ARM (armeabi-v7a). The screenshot below can be used as reference for creating an AVD.
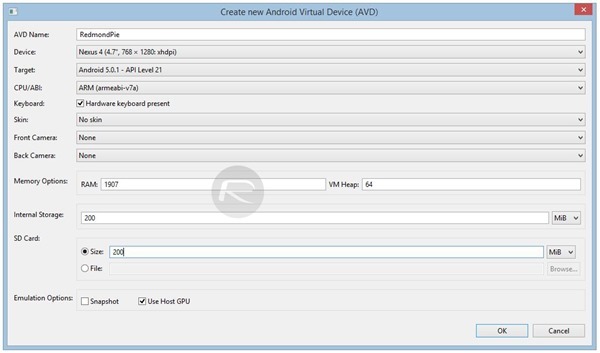
Note: It’s recommended that you do not change the values that are suggested by the AVD Manager. But in case you have a PC that has less memory, only then it is recommended that you tone things down a bit.
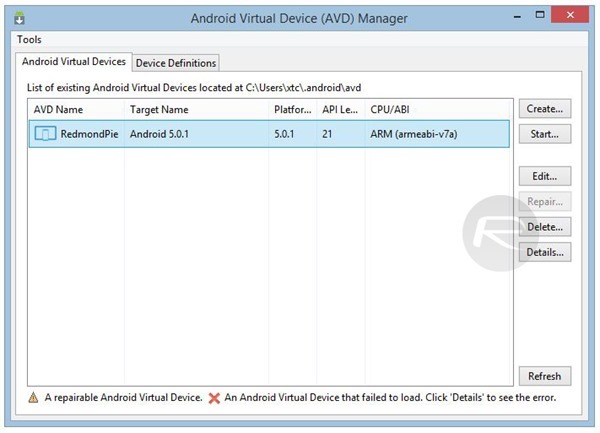
Step 10: Once the new AVD has been created, hit the OK button to save it and close the window.
Step 11: Now that the AVD has been created, run the AVD Manager again, select the created AVD, and hit the Start button.
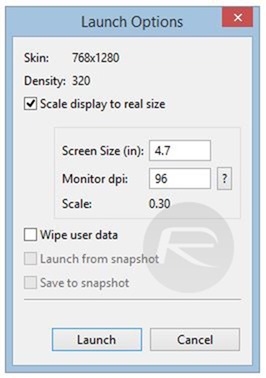
Step 12: When the Launch window pops up, do enable the Scale display to real size option, unless you want the emulator to take up your entire screen. You can play around with the rest of the settings later, for now, hit the Launch button.
Note: It’s quite possible that the emulator might not work for everyone in the first go and you might experience a crash or two. In case that happens, we recommend that you reboot your PC, and follow steps 7 through 12 again.
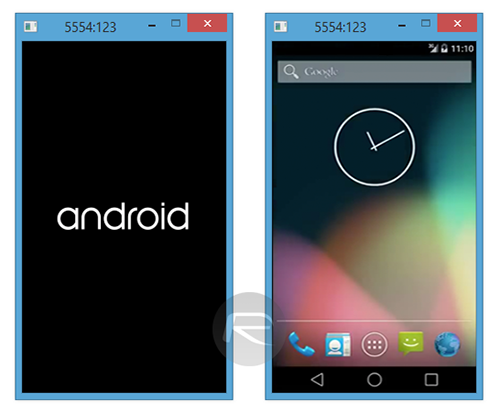
It might take some time to boot up Android virtually, but once done, you will be presented with a fresh sight of Android Lollipop to test drive on your PC.
You can follow us on Twitter, add us to your circle on Google+ or like our Facebook page to keep yourself updated on all the latest from Microsoft, Google, Apple and the web.

