As you may already know by now, OS X Yosemite is out, and is a free upgrade. So if you’re coming from previous version of OS X, you can download OS X Yosemite from the Mac App Store free of charge to upgrade your machine. However, if you wish for a complete clean install of OS X’s latest on your Mac, the best way to go about this is to create a bootable USB drive of Yosemite. In this guide we will show you how to do just that.
The older method used to make bootable drives of OS X Lion and Mountain Lion installer did not work for OS X Mavericks. Same is the case with OS X Yosemite, which follows similar installation pattern to OS X Mavericks.
Requirements:
- A Mac with ‘Install OS X Yosemite.app’ file downloaded from Mac App Store.
- A USB flash drive with at least 8GB storage capacity.
How To Make OS X Yosemite Bootable USB Flash Drive:
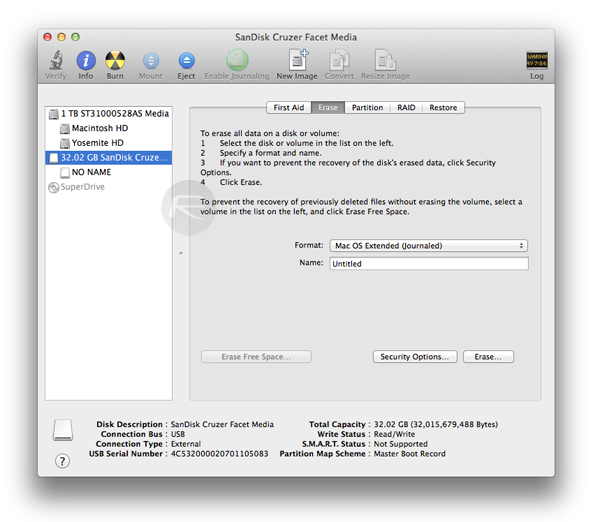
Step 1: First up, you will need to format the USB drive. To do this, start ‘Disk Utility’, select the flash drive from the left sidebar, select ‘Erase’ tab from right, and make sure the name is set to ‘Untitled’, format is set as ‘Mac OS Extended (Journaled)’. Now, click on ‘Erase…’ button, as shown in the screenshot below.
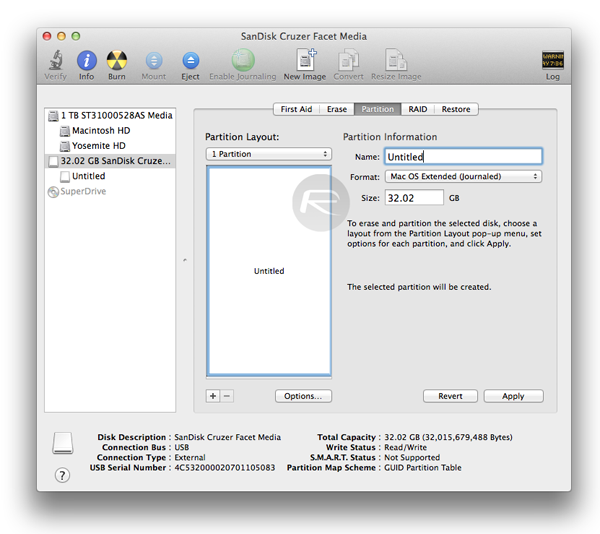
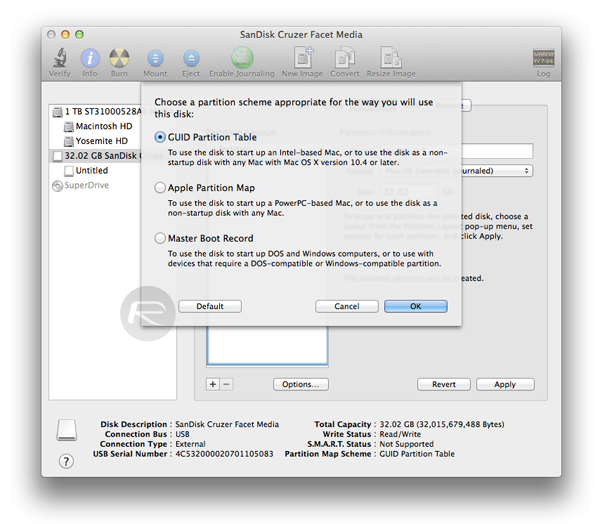
Step 2: Next, select ‘Partition’ tab. Select ‘1 Partition’ from ‘Partition Layout’ dropdown menu. Click on ‘Options’ and make sure ‘GUID Partition Table’ is selected as partition scheme. Also make sure the name is set to ‘Untitled’, not ‘Untitled 1’ or anything else. Once done, click on Apply to create this partition.
Step 3: Download OS X 10.10 Yosemite from Mac App Store. Once downloaded, quit the installer and make sure that the OS X Yosemite installer that you downloaded from the Mac App Store, is in Applications folder, and set to its default name; ‘Install OS X Yosemite.app’.
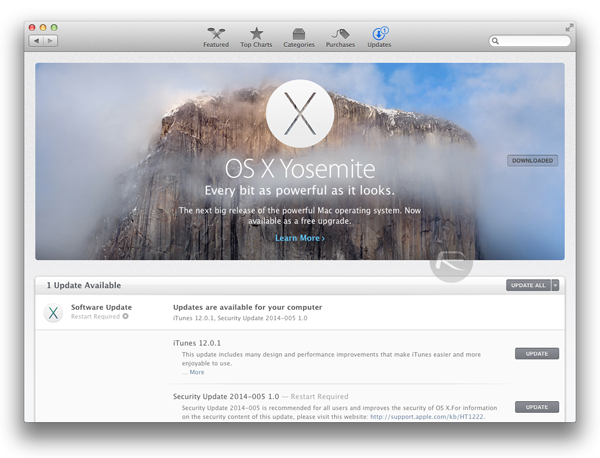
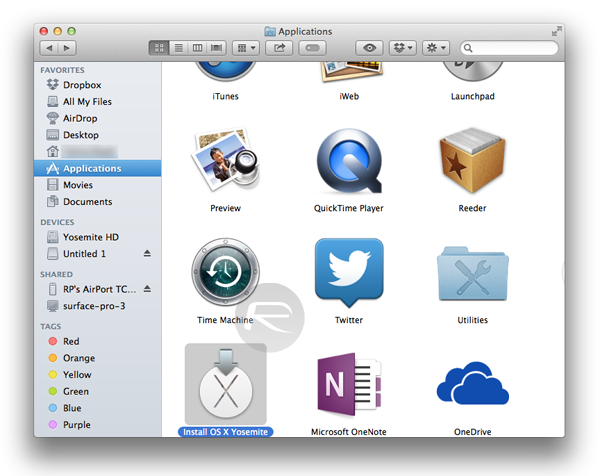
Step 4: Start Terminal, type in the following code, and hit Enter:
sudo /Applications/Install\ OS\ X\ Yosemite.app/Contents/Resources/createinstallmedia –volume /Volumes/Untitled –applicationpath /Applications/Install\ OS\ X\ Yosemite.app –nointeraction
Note: The code above is missing double dashes in some locations (for some reason it is not letting me add in the quote above). Please tally it with this one shown in the image right below:
![]()
Terminal will now prompt you to enter your OS X password, so type it in, and hit Enter again to begin the process.
Step 5: It could take around 10 to 20 minutes or so for the process to complete. Note: DO NOT remove your flash drive until Terminal shows ‘Done’ at the end of the process, as can also be seen in the screenshot below:
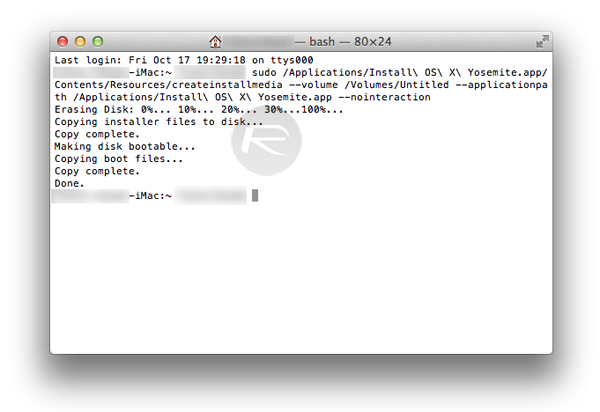
That’s it! Your Yosemite bootable flash drive is ready for clean installation.
You can follow us on Twitter, add us to your circle on Google+ or like our Facebook page to keep yourself updated on all the latest from Microsoft, Google, Apple and the web.

